Monthly Archives: July 2024

canon t70 manual

Canon T70 User Manual

The Canon T70 User Manual is an essential resource for mastering the camera’s features and functions. It provides detailed guidance on camera setup, shooting modes, and maintenance.

From battery installation to film loading, the manual offers step-by-step instructions. It also covers advanced modes like aperture priority and manual operation, ensuring optimal photography experiences.

Welcome to the Canon T70 User Manual, your comprehensive guide to understanding and utilizing your camera effectively. This manual is designed to help you navigate the camera’s features, settings, and functions, ensuring you make the most of your photography experience.

Within these pages, you’ll discover detailed instructions for setting up your camera, loading film, and exploring advanced shooting modes. Whether you’re a beginner or an experienced photographer, this manual provides the insights needed to unlock the full potential of your Canon T70.

1.2 Navigating the Manual

This manual is organized to guide you through the Canon T70’s features and operations seamlessly. It begins with setup instructions, followed by detailed explanations of shooting modes, advanced functions, and troubleshooting tips.

Each section is designed to be user-friendly, with clear headings and concise instructions. Use the table of contents or index to quickly locate specific topics, ensuring you can easily navigate and find the information you need to master your Canon T70.

Canon T70 Repair Manual

The Canon T70 Repair Manual provides comprehensive DIY repair guidelines, parts catalog, and technical details for professionals and enthusiasts to maintain and restore the camera effectively.

2.1 Overview of the Repair Manual

The Canon T70 Repair Manual offers a detailed guide for servicing and maintaining the camera. It includes sections on disassembling the camera, adjusting components, and replacing parts. The manual is designed for professionals and enthusiasts, providing step-by-step instructions for troubleshooting and repair. It also features a parts catalog, ensuring users can identify and source necessary components. This resource is invaluable for extending the life and functionality of the Canon T70, making it a must-have for camera technicians and enthusiasts.

2.2 DIY Repair Guidelines

The DIY repair guidelines for the Canon T70 provide step-by-step instructions for common fixes. Users can learn to replace worn-out parts, clean internal mechanisms, and resolve issues like stuck shutters or faulty light meters. The manual emphasizes using the correct tools, such as screwdrivers and grounding straps, to prevent damage. It also offers tips for reassembling components accurately. These guidelines empower enthusiasts to perform basic repairs, ensuring their camera remains functional and ready for use. Safety precautions and detailed diagrams are included to guide novices effectively.

Canon T70 Parts Catalog

The Canon T70 Parts Catalog provides a detailed list of components, including lenses, shutters, and internal mechanisms. It helps users identify and source replacement parts efficiently.

3.1 Detailed Parts List

The Canon T70 Parts Catalog includes a comprehensive list of components, such as the FD mount lenses, viewfinder, shutter mechanism, and Shutter Speed Dial. It details internal mechanisms like the aperture control system and film advance lever. The catalog also provides diagrams for assembly and disassembly, aiding in repairs and maintenance. Each part is numbered and described, ensuring users can identify and source replacements efficiently. This resource is invaluable for technicians and enthusiasts alike, promoting a deeper understanding of the camera’s construction and functionality.

3.2 Understanding the Catalog

The Canon T70 Parts Catalog is a detailed reference guide designed to help users identify and understand the camera’s components. It includes part numbers, diagrams, and descriptions, making it easier to locate and replace specific parts. The catalog is structured to aid technicians and enthusiasts in repairs and maintenance. By cross-referencing part numbers, users can ensure accuracy when ordering replacements. This resource is essential for anyone looking to repair or upgrade their Canon T70, providing clarity and precision in understanding its construction.

Historical Overview of the Canon T70

The Canon T70, introduced in 1975, marked a significant milestone in SLR technology, offering a blend of advanced features and user-friendly design that appealed to both professionals and enthusiasts.

4.1 Release and Impact

The Canon T70, released in 1982, was a groundbreaking 35mm SLR camera that significantly influenced the photography industry. Its introduction marked a shift toward more user-friendly designs, appealing to both professionals and enthusiasts. Featuring an LCD display and aperture priority mode, the T70 offered advanced functionality while remaining accessible. This camera played a pivotal role in popularizing SLR technology and laid the foundation for future Canon models. Its release solidified Canon’s reputation as a leader in innovative camera design.

4.2 Evolution in Camera Technology

The Canon T70 marked a significant step in camera technology evolution, introducing features like an LCD display for aperture and exposure settings. It built on earlier models by incorporating advanced modes such as aperture priority, making it more accessible to enthusiasts. The T70 also supported Canon’s FD lens series, enhancing compatibility and versatility. Its design influenced future SLR cameras, blending manual controls with automated functions. This camera exemplified the industry’s shift toward user-friendly, feature-rich devices, bridging the gap between professional and amateur photography.

Canon T70 Specifications

The Canon T70 is a 35mm single-lens reflex (SLR) film camera with a Canon FD lens mount and an LCD display for exposure settings. It features aperture priority and manual modes, offering versatility for photographers. The camera supports a wide range of FD lenses and is known for its durable build and user-friendly design, making it a popular choice for both professionals and enthusiasts.

5.1 Key Features

The Canon T70 boasts a 35mm film format, aperture priority mode, and manual override capabilities. It features an LCD display for easy exposure adjustments and utilizes the Canon FD lens mount, compatible with a wide range of lenses. The camera includes a focal-plane shutter and supports flash photography. Its compact design and intuitive controls make it accessible for both casual and advanced photographers, ensuring high-quality images with precise control over settings.

5.2 Technical Details

The Canon T70 operates with a 35mm film format, featuring a focal-plane shutter with speeds from 1 second to 1/1000th of a second. It uses the Canon FD lens mount, supporting a variety of FD-series lenses. The camera includes an LCD display for exposure settings and offers aperture priority and manual modes. Its dimensions are 14.7 cm (W) x 9.3 cm (H) x 5.3 cm (D), weighing approximately 560 grams without the lens, making it a compact yet robust film SLR camera.

Loading Batteries and Film

Insert a 6V battery into the compartment, ensuring it clicks securely. For film, align the leader with the take-up spool and gently close the camera back.

6.1 Battery Installation

To install the battery in your Canon T70, open the battery compartment located on the bottom of the camera. Insert a 6V battery, ensuring it aligns with the polarity markers. Gently close the compartment until it clicks securely. Avoid using damaged batteries or incorrect types, as this could harm the camera. Always check the battery level before use to ensure proper functionality.

6.2 Film Loading Process

Open the camera back by sliding the release latch. Insert the film cartridge, aligning the film leader with the guide. Gently advance the film by turning the winding lever until it stops at the first frame. Ensure the film is securely seated and the leader is properly aligned. Close the camera back firmly to maintain light protection. Set the film speed using the dial on the top plate. Wind the film slightly before taking the first shot to ensure proper advancement.

Canon T70 Features

The Canon T70 offers advanced features like aperture priority mode and manual mode for precise control. It includes a built-in LCD display for settings and compatibility with Canon FD lenses, enhancing versatility and performance for photographers.

7;1 Aperture Priority Mode

The Canon T70’s aperture priority mode allows photographers to set the desired aperture, with the camera automatically adjusting the shutter speed for optimal exposure. This mode is ideal for controlling depth of field, enabling creative decisions about blurred or sharp backgrounds. The aperture value is selected using the aperture ring on the lens, while the camera’s built-in metering system ensures precise shutter speed adjustments. This feature is particularly useful for portrait and landscape photography, offering a balance between user control and automatic functionality.

7.2 Manual Mode Operations

In Manual Mode, the Canon T70 offers full control over both aperture and shutter speed, allowing photographers to fine-tune exposures. The aperture is adjusted using the lens ring, while the shutter speed is set via the camera’s dial. The built-in metering system provides a manual exposure indicator, guiding precise adjustments. This mode is ideal for experienced users seeking creative flexibility, enabling customization of depth of field and motion capture. It requires a good understanding of exposure principles but offers unparalleled control for tailored results.

Troubleshooting Common Issues

This section guides users through identifying and resolving common issues with the Canon T70, ensuring optimal performance and extending the camera’s lifespan.

8.1 Error Identification

Error identification is crucial for resolving issues with the Canon T70. Common problems include battery drain, film loading errors, or display malfunctions. Users may encounter issues like inconsistent shutter speeds or faulty aperture readings. The camera’s LCD may flash error codes, such as “E” or “F,” indicating specific malfunctions. Properly identifying these errors is the first step toward effective troubleshooting and ensuring the camera operates smoothly. Referencing the manual’s error guide helps users pinpoint the root cause accurately. This section provides clear descriptions of potential issues and their symptoms, enabling quick diagnosis and resolution. By understanding these signs, photographers can address problems before they escalate, ensuring uninterrupted shooting sessions. Regular maintenance and checking for firmware updates can also prevent many common errors from occurring. Keeping the camera clean and storing it properly further reduces the likelihood of malfunctions, ensuring longevity and reliability;

8.2 Resolution Techniques

Resolving common issues with the Canon T70 requires practical techniques. For battery-related errors, ensure connections are clean and batteries are properly installed. If film loading fails, rewind and reload the film carefully. Aperture or shutter malfunctions may require professional servicing. Display issues can often be fixed by resetting the camera or replacing the batteries. Regular cleaning of the lens and viewfinder prevents dust-related problems. Storing the camera in a dry, cool place reduces the risk of internal damage. Always refer to the manual for specific troubleshooting steps to restore optimal functionality. Proper maintenance and timely repairs ensure the camera’s longevity and performance. Addressing issues promptly helps prevent further complications and keeps the camera operational for years. By following these techniques, users can resolve most common problems effectively. Regular inspections and adherence to maintenance routines further enhance the camera’s reliability and overall performance. This approach ensures photographers can continue capturing high-quality images without interruption. Proper care and timely resolutions are key to maintaining the Canon T70’s functionality and extending its lifespan.

Maintenance and Care Tips

Regularly clean the camera’s lens and viewfinder to prevent dust buildup. Store the Canon T70 in a dry, cool place to avoid moisture damage.

Check battery expiration dates and film expiration for optimal performance. Avoid extreme temperatures and handle the camera with care to maintain its functionality and longevity.

9.1 Cleaning the Camera

Use a soft, dry cloth to gently wipe the camera’s exterior and lens. Avoid harsh chemicals or abrasive materials that may damage the finish or glass surfaces.

For the viewfinder and LCD, use a microfiber cloth dampened with distilled water. Regular cleaning prevents dust buildup and ensures clear visibility for precise shots.

Store the camera in a protective case when not in use to minimize exposure to dust and moisture, preserving its functionality and longevity.

9.2 Storage Recommendations

Store the Canon T70 in a cool, dry place away from direct sunlight and moisture. Use silica gel packets to absorb humidity and prevent fungus growth.

Keep the camera in its original case or a protective bag when not in use. Avoid extreme temperatures and ensure the battery compartment is clean and dry before storage.

Compatible Accessories

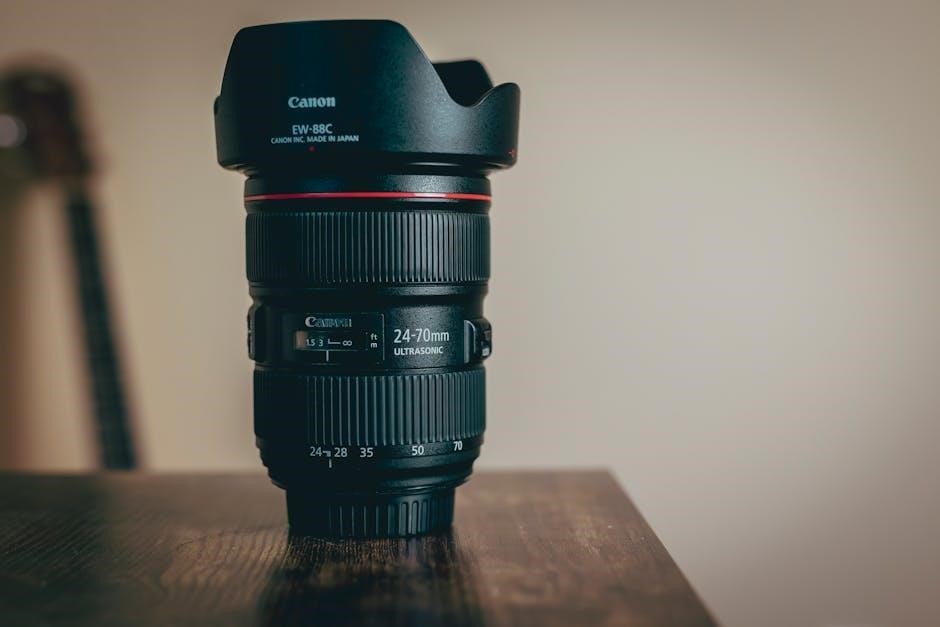
The Canon T70 supports FD series lenses, adapters, and accessories. Compatible lenses include the FD 50mm f/1.8 and FD 28-80mm f/3.5-5.6 II for versatile photography options.

Additional accessories like external flashes, remote shutters, and protective cases enhance functionality and camera protection, ensuring optimal performance and longevity of the Canon T70.

10.1 Lenses and Adapters

The Canon T70 is compatible with FD-mount lenses, offering a wide range of focal lengths and apertures. Popular options include the FD 50mm f/1.8 and FD 28-80mm f/3.5-5.6 II, which provide sharp images and versatility for various shooting scenarios. Additionally, adapters allow mounting of other lens types, expanding creative possibilities for photographers. These lenses and adapters ensure compatibility and enhance the T70’s functionality, making it a versatile tool for both casual and professional use.

10.2 Other Essential Accessories

Beyond lenses, the Canon T70 supports various accessories to enhance functionality. A dedicated flash unit, such as the Speedlite series, improves low-light photography. The camera also works with remote shutter releases, reducing camera shake. Additional essentials include protective cases, tripods for stability, and extra battery packs. Film enthusiasts can benefit from compatible film rolls, while optional LCD viewfinders offer enhanced compositional control. These accessories ensure versatility and convenience for photographers using the Canon T70.

Downloading the Canon T70 Manual

The Canon T70 manual is freely available as a PDF download from sources like ManualsLib and Butkus.org, offering detailed guides for camera functions and troubleshooting.

11.1 Sources for Download

The Canon T70 manual can be downloaded from trusted sources like ManualsLib, Butkus.org, and ManualsBase. These websites provide free PDF downloads, ensuring easy access to the manual. ManualsLib offers a direct link to the Canon T70 manual, while Butkus.org hosts a comprehensive library of camera manuals, including the T70. ManualsBase also provides a free PDF version, making it convenient for users to find and download the manual without hassle.

  • ManualsLib: Free PDF downloads with multiple language options.
  • Butkus.org: Extensive archive of vintage camera manuals, including the T70.
  • ManualsBase: Easy-to-access PDFs for quick reference.

11.2 Installation and Viewing

Once downloaded, save the Canon T70 manual PDF to a designated folder for easy access. Use a PDF reader like Adobe Acrobat to open and view the document. The manual is fully searchable, with zoom features for detailed viewing. Printing options are available through services like Butkus.org, offering black and white prints. Ensure your device has compatible software for seamless access and navigation.

  • Save the PDF to a dedicated folder for quick retrieval.
  • Use a PDF reader to access and navigate the manual.
  • Printing services are available for hard copies.

Frequently Asked Questions

  • How do I install batteries in the Canon T70?

    Insert two LR44 batteries, ensuring correct polarity.
  • How do I load film?

    Open the back, align the film leader, and advance to the first frame.
  • What if the camera shows an error?

    Check the manual for error codes and troubleshooting steps.
  • Can I use modern lenses with the T70?

    Yes, it supports FD-mount lenses for compatibility.

12.1 Common Queries

Users often ask about battery installation, film loading, and error resolution. Queries also include compatibility with modern lenses and troubleshooting shutter issues. Additionally, many seek advice on manual mode operations and optimal camera maintenance. These topics are frequently discussed in forums and guides, ensuring comprehensive support for Canon T70 users. The manual addresses these concerns, providing clear solutions and enhancing user experience. Regular updates and community feedback further assist in resolving common issues effectively.

12.2 Expert Answers

Experts recommend checking battery polarity for installation issues and ensuring film is loaded correctly to avoid jams. For error resolution, verify the LCD display and consult the manual. When using manual mode, adjust aperture and shutter speed carefully for precise control. Regular cleaning and proper storage maintain camera performance. Compatibility with FD-mount lenses is confirmed, but adapters may be needed for modern systems. Troubleshooting shutter issues often involves professional servicing. Follow these tips for optimal functionality and photography results with the Canon T70.

hoover max extract 77 user manual

The Hoover Max Extract 77 is a powerful deep cleaner designed for effective carpet and hard floor cleaning. It features SpinScrub technology, portability, and dual water tanks for efficient cleaning.

1.1 Overview of the Hoover Max Extract 77

The Hoover Max Extract 77 is a versatile deep cleaner designed for carpets and hard floors. It features SpinScrub technology for effective cleaning and dual water tanks for easy maintenance. With portability and multiple cleaning modes, it caters to various cleaning needs. Available in models like SpinScrub and Deep Cleaner, it ensures efficient and thorough cleaning results for different surfaces.

1.2 Importance of the User Manual

The user manual is essential for understanding the Hoover Max Extract 77’s features, safety guidelines, and troubleshooting tips. It provides detailed operating instructions, helping users maximize cleaning efficiency and maintain the device properly. Available for free, the manual is rated highly by users and is a vital resource for optimizing performance and ensuring longevity of the cleaner.

Key Features of the Hoover Max Extract 77

The Hoover Max Extract 77 offers SpinScrub technology, dual water tanks, and a lightweight design for efficient cleaning. Its portability and advanced cleaning modes ensure superior performance.

2.1 Design and Build Quality

The Hoover Max Extract 77 features a durable and lightweight design, making it easy to maneuver. Its compact frame and ergonomic handles allow for comfortable use. The high-quality materials ensure long-lasting performance, while the sleek appearance complements any home decor. Built with practicality in mind, it balances functionality and aesthetics effectively.

2.2 Cleaning Technology and Capabilities

The Hoover Max Extract 77 utilizes advanced SpinScrub technology for deep carpet cleaning. Its powerful suction and rotating brushes effectively remove dirt and stains. The machine is designed for both carpets and hard floors, offering versatile cleaning options. It also features a water tank system that separates clean and dirty water, ensuring efficient and hygienic cleaning sessions.

2.3 Water Tank Capacity and Portability

The Hoover Max Extract 77 features a large water tank capacity, allowing extended cleaning sessions without frequent refills. Its compact and lightweight design enhances portability, making it easy to maneuver across various floor types. The machine is built to handle both small and large spaces efficiently, ensuring thorough cleaning with minimal effort. This design prioritizes user convenience and effectiveness.

Safety Precautions and Guidelines

Ensure safety by reading the manual thoroughly. Avoid hot water and keep children away. Never use damaged cords or nearby flammable liquids. Follow guidelines strictly.

3.1 General Safety Tips for Operation

Always read the manual before use. Ensure the cleaner is placed on a level surface and avoid hot water. Keep children and pets away during operation. Never use damaged cords or accessories. Avoid flammable liquids nearby. Turn off and unplug when not in use or during maintenance. Supervise children and ensure proper ventilation in the cleaning area.

3.2 Precautions Before First Use

Before using the Hoover Max Extract 77, inspect the cleaner for any damage. Read the user manual thoroughly to understand its operation. Ensure all parts are properly assembled and nothing is blocked. Avoid using hot water initially and keep the cleaner on a stable surface. Always check for any loose connections or worn-out components to ensure safe and effective operation from the start.

Installation and Setup Instructions

Installation and setup involve unboxing, checking all components, assembling the cleaner, and ensuring proper connections. Refer to the manual for detailed guidance.

4.1 Unboxing and Initial Assembly

Carefully unbox the Hoover Max Extract 77, ensuring all components are included. Begin by assembling the handle and wheels, then attach the water tank and brushes. Follow the manual’s step-by-step instructions for proper setup, ensuring all parts are securely locked in place. Verify that all connections are tight to avoid leaks during operation.

4.2 Connecting and Testing Components

Connect the hoses and brushes securely to the cleaner. Fill the water tank and check for leaks. Plug in the device and test the suction power. Ensure all components, such as the SpinScrub brushes, are functioning properly. Verify that the clean and dirty water tanks are correctly attached before operation. Follow the manual’s guidelines to ensure optimal performance.

Operating the Hoover Max Extract 77

The Hoover Max Extract 77 is designed for efficient cleaning. Simply fill the water tank, select the desired mode, and begin cleaning. Use the SpinScrub brushes for deep carpet cleaning and switch to hard floor mode for other surfaces. Always ensure the machine is properly assembled before use.

5.1 Basic Operation Modes

The Hoover Max Extract 77 offers multiple operation modes for versatile cleaning. The Carpet mode uses SpinScrub brushes for deep cleaning, while Hard Floor mode gently cleans surfaces. Spot Cleaning mode targets stains and small areas. Switch between modes easily using the control panel. Always ensure the correct mode is selected for your cleaning task to achieve optimal results.

5.2 Advanced Cleaning Settings

The Hoover Max Extract 77 features advanced settings for tailored cleaning. Adjust suction power with the variable control dial for delicate or heavy-duty tasks. The heated cleaning option sanitizes surfaces, while the brush speed adjustment optimizes cleaning for different floor types. Use these settings to customize your cleaning experience and achieve professional-grade results. Always refer to the manual for optimal setting combinations.

Maintenance and Troubleshooting

Regular maintenance ensures optimal performance. Clean filters, empty tanks, and check for blockages. Troubleshoot common issues like low suction or malfunctioning brushes by referring to the manual.

6.1 Regular Maintenance Tasks

Regular maintenance is crucial for the Hoover Max Extract 77’s longevity and efficiency. Users should clean or replace filters, empty and rinse water tanks, and inspect hoses for blockages. Additionally, brushes should be checked for hair or debris buildup. Lubricating moving parts and ensuring all connections are secure also prevents operational issues. Always refer to the manual for specific guidance.

6.2 Common Issues and Solutions

Common issues with the Hoover Max Extract 77 include water not flowing, clogged filters, or brush roller malfunction. Solutions involve checking for blockages, cleaning or replacing filters, and ensuring proper assembly. Regularly emptying water tanks and lubricating moving parts can also resolve operational issues. Refer to the manual for troubleshooting steps to maintain optimal performance.

Accessories and Replacement Parts

The Hoover Max Extract 77 supports various accessories, including SpinScrub brushes and duster filters. Replacement parts are available on the official Hoover website or select retailers.

7.1 Recommended Accessories

The Hoover Max Extract 77 works seamlessly with SpinScrub brushes for deep carpet cleaning and a duster filter for hard floors. Additional accessories include crevice tools and upholstery brushes, available on the official Hoover website or authorized retailers. These enhance cleaning efficiency and versatility for various surfaces.

7.2 Where to Find Replacement Parts

Replacement parts for the Hoover Max Extract 77, such as filters and brushes, can be found on the official Hoover website or through authorized retailers. Ensure to purchase genuine parts to maintain performance and warranty validity. Refer to the user manual for specific part numbers or contact Hoover customer service for assistance in locating authorized sellers.

Comparing the Hoover Max Extract 77 to Other Models

The Hoover Max Extract 77 stands out for its advanced SpinScrub technology and dual water tanks, offering superior cleaning efficiency compared to similar models in its class.

8.1 Key Differences from Similar Products

The Hoover Max Extract 77 distinguishes itself with its SpinScrub technology, dual water tanks, and portability. It offers superior cleaning efficiency and ease of use compared to other models, making it a top choice for deep cleaning carpets and hard floors. Its design and features cater to both residential and light commercial needs, setting it apart in the market.

8.2 Unique Selling Points

The Hoover Max Extract 77 stands out with its advanced SpinScrub technology, providing deep carpet cleaning and gentle hard floor care. Its lightweight design and large water tanks enhance portability and cleaning efficiency. Additionally, the easy-to-use controls and affordable pricing make it an attractive option for homeowners seeking a reliable and versatile cleaning solution.

Frequently Asked Questions (FAQs)

Common questions about the Hoover Max Extract 77 include queries about replacement parts, troubleshooting, and optimal cleaning techniques. Users often ask where to find manuals or resolve issues like water not releasing during use. For detailed solutions, refer to the official Hoover website or contact their customer support team for assistance.

9.1 Common Questions About Performance

Users often inquire about the Hoover Max Extract 77’s cleaning efficiency, especially regarding water flow issues and suction power. Some report problems with water not releasing during floor cleaning, while others seek tips to maintain optimal performance. The manual recommends regular filter cleaning and proper tank assembly to ensure effective operation. Troubleshooting guides are available online for common issues.

9.2 User-Reported Issues and Solutions

Users have reported issues like clogged filters and malfunctioning water tanks. Solutions include cleaning or replacing filters and ensuring tanks are securely attached; For suction problems, checking for blockages or damaged hoses is advised. Regular maintenance, as outlined in the manual, helps prevent these issues and maintains the cleaner’s performance over time.

Customer Support and Warranty Information

Hoover offers comprehensive customer support through their official website and phone service. The warranty covers parts and labor for a specified period, ensuring reliable protection for your investment.

10.1 Contacting Hoover Customer Service

For assistance, visit Hoover’s official website or call their customer service hotline. Support is available to address inquiries about the Max Extract 77, including troubleshooting and repair services. Online resources also provide FAQs and downloadable manuals for user convenience, ensuring quick solutions to common issues and maintenance needs.

10.2 Warranty Terms and Conditions

The Hoover Max Extract 77 is backed by a limited warranty covering defective parts and labor for a specified period. The warranty applies to original purchasers and requires proper product registration. For full details, refer to the user manual or visit Hoover’s official website. Unauthorized modifications or misuse may void coverage.

Environmental and Energy Efficiency

The Hoover Max Extract 77 features eco-friendly design with energy-efficient components. Its auto-shutoff function reduces energy waste, making it an environmentally responsible choice for cleaning tasks.

11.1 Eco-Friendly Features

The Hoover Max Extract 77 incorporates eco-friendly features such as an energy-efficient motor and recyclable components. Its auto-shutoff function reduces power consumption, aligning with environmental standards. The machine is designed for low water usage, making it a sustainable option for home cleaning. Additionally, the use of non-toxic materials ensures minimal environmental impact, promoting greener cleaning practices.

11.2 Energy Consumption and Savings

The Hoover Max Extract 77 is Energy Star certified, ensuring low energy consumption. Its efficient motor reduces power usage while maintaining performance. The machine features intelligent energy management, optimizing power for different cleaning tasks. This design leads to significant energy savings and lower electricity bills over time, making it a cost-effective option for eco-conscious users.

User Reviews and Feedback

Users praise the Hoover Max Extract 77 for its effectiveness in deep cleaning and ease of use. Many highlight its value for money, while some suggest improvements in design or additional features.

12.1 Positive Aspects Highlighted by Users

The Hoover Max Extract 77 is praised for its powerful cleaning performance, ease of use, and value for money. Users appreciate its SpinScrub technology, dual water tanks, and portability. Many highlight its effectiveness in deep cleaning carpets and hard floors, while others commend its lightweight design and maneuverability, making it ideal for cleaning stairs and large spaces efficiently.

12.2 Areas for Improvement

Some users note that the Hoover Max Extract 77 has a smaller water tank, requiring more frequent refills. Others mention it can be heavy, making it less portable for multi-floor cleaning. A few users find the initial assembly and filter maintenance somewhat confusing. While overall a solid cleaner, these areas could be enhanced for better user experience and convenience.

The Hoover Max Extract 77 is a reliable and efficient deep cleaner, offering excellent performance for various surfaces. Its innovative features and user-friendly design make it a solid investment for maintaining clean and hygienic spaces.

13.1 Final Thoughts on the Hoover Max Extract 77

The Hoover Max Extract 77 stands out as a versatile and efficient deep cleaner, combining robust cleaning power with user-friendly design. Its innovative features, such as SpinScrub technology and dual water tanks, ensure thorough cleaning across various surfaces. With proper maintenance and use, it delivers long-lasting performance, making it a valuable addition to any cleaning routine.

13.2 Recommendations for Potential Buyers

For those considering the Hoover Max Extract 77, it is ideal for deep cleaning carpets and hard floors. Its portability and dual water tanks make it convenient for large spaces. Ensure to follow the user manual for optimal performance and maintenance. Additionally, Hoover’s customer support and availability of replacement parts add to its long-term value and reliability.

About the Manufacturer

Hoover is a renowned brand with a long history of innovation in cleaning technology. Known for producing reliable and efficient cleaning solutions, Hoover has built a reputation for quality and durability, making it a trusted name in household and commercial cleaning equipment.

14.1 Hoover’s Commitment to Quality

Hoover has consistently demonstrated a strong commitment to quality through its rigorous manufacturing processes and innovative designs. The brand prioritizes durability and performance, ensuring that products like the Max Extract 77 meet high standards. By using advanced technologies and sustainable practices, Hoover maintains its reputation for delivering dependable cleaning solutions that exceed customer expectations.

14.2 History and Innovation in Cleaning Technology

Hoover has a rich history of pioneering cleaning solutions, dating back to the early 20th century. The brand has consistently pushed boundaries with innovative technologies, such as the first portable vacuum and advanced carpet cleaning systems. Its dedication to research and development ensures Hoover remains at the forefront of cleaning technology, delivering efficient and user-friendly products like the Max Extract 77.

cat cj1000dxt manual pdf

The CAT CJ1000DXT manual is your ultimate guide to understanding this powerful all-in-one power station․ It details features like the 1200 Peak Amp jump starter, 500 Instant Starting Amps, 200W power inverter, multiple USB ports, and a 12V DC outlet․ The manual ensures safe and effective operation, covering essential safety guidelines, troubleshooting, and technical specifications․ Available for download, it’s a must-have resource for users seeking to maximize their device’s potential․

Product Features

The CAT CJ1000DXT is a versatile power station designed to meet a variety of needs․ It features a 1200 Peak Amp jump starter, capable of reviving most 12V vehicles, and 500 Instant Starting Amps for reliable performance․ The device also includes a 200W integrated power inverter, perfect for powering small electronics․ With four 2-amp USB charging ports, you can charge multiple devices simultaneously․ Additionally, the 12V DC accessory outlet provides a convenient power source for automotive accessories․ The CJ1000DXT also includes a 120 PSI air compressor for inflating tires and other inflatables․ Its compact design, combined with a rubber grip handle, ensures portability and ease of use․ The digital display offers clear feedback on battery status and operational modes, making it user-friendly․ This all-in-one tool is ideal for emergencies, camping trips, or everyday use, offering a comprehensive solution for power needs on the go․

Safety Guidelines

Safety is paramount when using the CAT CJ1000DXT․ Always read and follow the manual carefully to ensure proper usage․ Avoid smoking or exposing the device to sparks or flames, as this could lead to battery explosion․ Never operate the unit when tired or impaired․ Keep the device away from children and pets․ Ensure the area is well-ventilated during use․ Avoid inserting foreign objects into ports or outlets․ Follow all charging instructions precisely to prevent damage or hazards․ Store the unit in a cool, dry place when not in use․ Regularly inspect cables and connectors for damage․ Do not exceed the recommended load for the inverter or DC outlet․ Always disconnect the device when not in operation․ For detailed safety protocols, refer to the manual․

Quick Start Guide

Get started with your CAT CJ1000DXT using this quick start guide․ First, charge the unit fully before initial use․ Ensure the battery level is above 20% for optimal performance․ Familiarize yourself with the user interface, including the display, switches, and ports․ For jump-starting, connect the clamps to the vehicle’s battery terminals, ensuring correct polarity (red to positive, black to negative)․ Press the power button to activate the jump-start function․ For the power inverter, plug your device into the 120V outlet or use the USB ports for charging․ Always refer to the vehicle’s manual for compatibility․ Keep the unit away from flammable materials and avoid overloading the outlets․ If issues arise, consult the troubleshooting section in the full manual․ This guide provides basic steps, but for detailed instructions, refer to the complete CAT CJ1000DXT manual PDF․

Troubleshooting Common Issues

If your CAT CJ1000DXT isn’t functioning as expected, troubleshooting can resolve most issues․ If the jump starter doesn’t turn on, ensure the battery has at least 20% charge and the power button is pressed firmly․ For vehicles that won’t start, check that clamps are securely attached to the correct terminals (red to positive, black to negative) and the battery level is sufficient․ If the USB ports aren’t charging devices, reset the unit by turning it off and on or ensure no debris is blocking the ports․ The power inverter may not activate if the connected device exceeds the 200W limit․ For the air compressor, ensure proper hose connections and that the tire valve is fully open․ Consult the manual for detailed solutions and always follow safety guidelines to prevent hazards; Regular maintenance, like updating firmware, can also address unexpected issues․

Safety Instructions for Charging

When charging the CAT CJ1000DXT, always follow these safety guidelines to prevent accidents․ Ensure the unit is placed on a stable, flat surface away from flammable materials․ Avoid exposing the device to water or moisture during charging․ Never smoke or allow sparks or open flames near the charger or battery․ Use only the approved CAT charger and adapter provided to prevent damage or fire hazards․ Keep children and pets away from the charging area․ Do not insert foreign objects into the USB ports or AC outlet․ If the charger or cord is damaged, discontinue use immediately․ Avoid overcharging by monitoring the battery level and disconnecting once fully charged․ Store the charger in a cool, dry place when not in use․ Failure to adhere to these instructions may result in electrical shock, fire, or equipment damage․ Always refer to the manual for specific charging requirements․

Technical Specifications

The CAT CJ1000DXT boasts impressive technical specifications, making it a reliable choice for vehicle emergencies․ It features a 1200 Peak Amp jump starter, delivering 500 Instant Starting Amps for quick engine ignition․ The integrated 200W power inverter allows you to power small electronic devices, while four 2-amp USB ports provide rapid charging for smartphones and tablets․ A 12V DC accessory outlet is included for powering additional equipment․ The air compressor operates at 120 PSI, ideal for inflating tires and other inflatable items․ With a robust design, this multifunctional device is engineered to handle demanding conditions․ Its compact size and portability make it an essential tool for drivers seeking versatility and reliability․ These specifications ensure the CAT CJ1000DXT is a comprehensive solution for automotive and power needs, offering unmatched performance and convenience in one unit․

How to Use the Device

Start by charging the CAT CJ1000DXT and ensuring all connections are secure․ For jump-starting, attach the clamps to the vehicle’s battery terminals․ Use the power inverter for electronics, USB ports for charging, and the DC outlet for accessories․ Always follow safety guidelines and operating instructions detailed in the manual for optimal performance and safety․

Preparing for Use

Before using the CAT CJ1000DXT, ensure the device is fully charged․ Inspect the clamps and cables for damage, and clean the terminals if necessary․ Charge the unit using the provided AC adapter, avoiding overcharging․ Familiarize yourself with the control panel and ports․ Always read the vehicle’s manual to confirm compatibility and proper jump-starting procedures․ Store the device in a dry, cool place when not in use․ Check the battery voltage using the digital display before attempting to jump-start․ Keep the area clear of flammable materials and avoid loose clothing․ Ensure all accessories, like USB devices or DC-powered equipment, are compatible with the unit’s specifications․ Proper preparation ensures safe and effective operation of the CAT CJ1000DXT․

Jump Starting a Vehicle

To jump-start a vehicle using the CAT CJ1000DXT, ensure the device is fully charged and the vehicle is in park or neutral gear․ Turn off the engine, lights, and electronic accessories to prevent damage․ Locate the battery terminals and attach the positive (red) clamp to the positive terminal of the dead battery, then the negative (black) clamp to a grounded metal surface on the vehicle․ Avoid touching the clamps together to prevent sparks․ Start the working vehicle if using traditional jump-starting methods, though the CJ1000DXT often powers vehicles directly․ Once the vehicle starts, remove the clamps in reverse order․ If the vehicle doesn’t start, check connections and ensure the battery voltage matches the vehicle’s system․ Always refer to the vehicle’s manual for specific instructions and ensure compatibility with the CAT CJ1000DXT’s specifications․

Using the Power Inverter

The CAT CJ1000DXT features a built-in 200-watt power inverter, ideal for powering small electronic devices․ To use the inverter, first ensure the device is fully charged or connected to a power source․ Turn on the inverter using the designated switch and plug your device into the 120V AC outlet․ The inverter is perfect for charging laptops, phones, and other small appliances․ Always check the power requirements of your device to ensure it does not exceed the 200-watt limit․ For safety, avoid using high-power appliances like hair dryers or electric heaters․ Keep the inverter away from water and flammable materials․ If the device overloads, the inverter will automatically shut off․ For optimal performance, monitor the battery level and turn off unnecessary features when not in use․ Refer to the manual for specific guidelines on load limits and safe operation․

Charging USB Devices

The CAT CJ1000DXT is equipped with four 2-amp USB charging ports, making it convenient to charge multiple devices simultaneously․ To charge your USB devices, simply plug them into the available ports․ The device automatically detects the connected hardware and begins charging․ Ensure your USB cables are in good condition to avoid any charging issues․ The ports are compatible with most smartphones, tablets, and other USB-powered devices․ For faster charging, use the provided cables or original manufacturer cables․ Avoid using damaged cables or adapters, as they may cause overheating or malfunction․ When not in use, keep the USB ports clean and dry to maintain optimal performance․ The manual recommends charging devices while the unit is turned on to prevent deep battery discharge․ Always monitor the battery level and recharge the unit when necessary to ensure consistent power delivery․ This feature makes the CJ1000DXT a versatile power source for on-the-go needs․

Using the DC Outlet

The CAT CJ1000DXT features a 12V DC accessory outlet, designed for powering compatible devices such as lights, fans, or small electronics․ To use the DC outlet, ensure the device is turned on and the battery has sufficient charge․ Plug the DC connector of your device into the outlet, making sure it is securely seated․ The outlet is rated for 12V DC and can support devices with a maximum power draw compatible with the unit’s specifications․ Avoid exceeding the recommended power limit to prevent overheating or damage․ Always check the device’s voltage requirements before connecting to ensure compatibility․ Keep the outlet clean and dry to maintain proper functionality․ For extended use, monitor the battery level and recharge the unit as needed․ This feature adds versatility, allowing you to power essential accessories in various situations․ Follow the manual’s guidelines for safe and efficient operation of the DC outlet․

Importance of Reading Vehicle Manual

Reading your vehicle’s manual is crucial before using the CAT CJ1000DXT jump starter․ It ensures compatibility and safe operation, as not all vehicles support external starting assistance․ The manual provides specific guidelines for your vehicle’s make and model, helping you avoid potential damage to the electrical system or battery․ Understanding your vehicle’s unique requirements prevents mishaps and ensures the jump starter functions effectively․ Always confirm that external starting is permitted and follow the recommended procedures․ This step is vital for maintaining both your vehicle’s and the CAT CJ1000DXT’s performance and longevity․ By referring to your vehicle’s manual, you can address any specific precautions or instructions tailored to your car, ensuring a safe and successful jump-starting process every time․

User Interface

The CAT CJ1000DXT features an intuitive user interface designed for ease of operation․ The control panel includes a digital display, switches, and indicator lights that provide clear status updates․ The display shows battery level, mode selection, and error messages, ensuring you stay informed․ Dedicated buttons allow you to switch between jump starter, power inverter, and USB charging modes seamlessly․ The interface is laid out logically, with each function clearly labeled, making it easy to navigate even for first-time users․ The design prioritizes accessibility, ensuring that all controls are within reach and simple to operate․ This user-friendly setup minimizes confusion and maximizes efficiency, allowing you to utilize the device’s full potential without hassle․ The interface’s clarity and responsiveness contribute to a smooth and reliable user experience․

Maintenance and Storage

Proper maintenance and storage of the CAT CJ1000DXT are essential to ensure optimal performance and longevity․ Regularly inspect the device for signs of wear or damage, and clean it with a soft cloth to avoid dust buildup․ Store the unit in a cool, dry place, away from direct sunlight and flammable materials․ Avoid exposing it to extreme temperatures, as this can damage the battery․ When not in use for extended periods, recharge the battery every three months to prevent deep discharge․ Ensure all ports and connectors are clean and free of debris․ For long-term storage, keep the device upright on a stable surface to maintain balance and prevent accidental damage․ Always follow the manufacturer’s guidelines for storage to preserve the device’s functionality and safety features․ Proper care will extend the life of your CAT CJ1000DXT and ensure it remains reliable for future use․

Warranty Information

The CAT CJ1000DXT comes with a limited warranty that ensures coverage for manufacturing defects and material quality․ The warranty period varies depending on the product’s usage and registration․ For detailed information, refer to the official CAT website or the manual provided with your device․ The warranty typically covers repairs or replacements for faulty components within the specified timeframe․ However, damages caused by misuse, improper maintenance, or unauthorized modifications are not covered․ To maintain warranty validity, adhere to the guidelines outlined in the manual․ For any warranty-related inquiries, contact CAT’s customer support or visit their official website․ Properly registering your product can also enhance warranty benefits․ Always retain the purchase receipt and warranty card for verification purposes․ The CAT CJ1000DXT’s warranty is designed to provide peace of mind, ensuring your investment is protected against unexpected issues․

Frequently Asked Questions

  • Q: Is the CAT CJ1000DXT compatible with all vehicles?

    A: The CAT CJ1000DXT supports most 12V vehicles, but always check your vehicle’s manual to confirm compatibility․

  • Q: How long does it take to charge the device?

    A: Charging time varies depending on the power source, typically ranging from 4 to 6 hours for a full charge․

  • Q: Can I use the power inverter while charging the battery?

    A: Yes, the device allows simultaneous charging and power inversion, but ensure the unit is not overburdened․

  • Q: What safety features does the CAT CJ1000DXT include?

    A: It features overcharge protection, short-circuit prevention, and thermal monitoring to ensure safe operation․

  • Q: How should I store the CAT CJ1000DXT when not in use?

    A: Store it in a cool, dry place, avoiding extreme temperatures, and charge it every 3 months to maintain battery health․

  • Q: Can I purchase replacement parts or accessories?

    A: Yes, replacement parts and accessories are available through authorized CAT dealers or online retailers․

Compatible Vehicles

The CAT CJ1000DXT is designed to work with a wide range of vehicles, making it a versatile tool for emergencies․ It is compatible with most 12V vehicles, including cars, trucks, SUVs, and motorcycles․ The device can jump-start vehicles with up to 6․5L gasoline engines and 4․5L diesel engines, ensuring it can handle larger vehicles effectively․ Additionally, its 200W power inverter supports charging small electronic devices, making it a reliable companion for road trips or outdoor activities․ Always refer to your vehicle’s manual to confirm compatibility and ensure safe jump-starting․ This versatility and reliability make the CAT CJ1000DXT an excellent choice for drivers seeking a multi-functional power solution․

Environmental Considerations

The CAT CJ1000DXT is designed with environmental responsibility in mind․ Its efficient battery technology minimizes waste and reduces the environmental impact of frequent charging․ The device is built to last, reducing the need for frequent replacements and thus lowering electronic waste․ Additionally, the manual emphasizes proper disposal methods for batteries and other components to prevent harmful materials from entering landfills․ Users are encouraged to recycle old or damaged parts responsibly․ The integrated power management system ensures energy is used efficiently, minimizing overall energy consumption․ By following the manual’s guidelines, users can help protect the environment while enjoying the benefits of this versatile power station․ Environmental considerations are a key part of the CAT CJ1000DXT’s design philosophy, promoting sustainability without compromising performance․

The CAT CJ1000DXT manual serves as a comprehensive guide, ensuring users maximize the potential of this versatile power station․ It equips users with the knowledge to safely and effectively utilize the device’s jump-starting, power inverting, and charging capabilities․ By adhering to the manual’s instructions, users can handle emergencies confidently and efficiently․ The CAT CJ1000DXT is a reliable tool for automotive and outdoor needs, offering a blend of power and portability․ This manual underscores the importance of safety, proper usage, and maintenance to extend the device’s lifespan․ Whether for jump-starting vehicles or powering essential devices, the CAT CJ1000DXT proves to be an indispensable asset․ Always refer to the manual for optimal performance and to ensure environmental responsibility in its use and disposal․ This guide empowers users to make the most of their investment while prioritizing safety and sustainability․

nutrisystem grocery guide

The Nutrisystem Grocery Guide is a comprehensive tool designed to help individuals make healthier choices while shopping, promoting sustainable weight loss and better eating habits.

What is the Nutrisystem Grocery Guide?

The Nutrisystem Grocery Guide is a detailed resource created to assist users in making healthier food choices while shopping. It provides a structured approach to selecting groceries that align with weight loss goals and nutritional balance. The guide emphasizes portion control, meal planning, and the selection of nutrient-dense foods. It categorizes foods into protein sources, vegetables, fruits, whole grains, and dairy products, offering recommendations for each. Additionally, it includes practical shopping tips, such as reading nutrition labels and avoiding processed foods. The guide is designed to simplify grocery shopping, ensuring users stay on track with their diet plan while maintaining variety and flavor in their meals. It serves as a valuable companion for anyone aiming to lose weight and improve their overall health through mindful eating habits.

The Purpose of the Nutrisystem Grocery Guide

The Nutrisystem Grocery Guide is designed to empower individuals with the knowledge and tools needed to make informed, healthier food choices. Its primary purpose is to simplify grocery shopping by providing clear guidelines on selecting nutrient-dense foods that support weight loss and overall well-being. The guide helps users navigate the often confusing world of nutrition by categorizing foods into core groups and offering practical tips for meal planning and portion control. Additionally, it aims to educate users on how to avoid processed foods and decipher nutrition labels. By focusing on sustainable eating habits, the guide enables individuals to maintain their weight loss progress while enjoying a balanced and varied diet. Its ultimate goal is to foster long-term healthy lifestyle changes through education and practical application.

How the Nutrisystem Grocery Guide is Structured

The Nutrisystem Grocery Guide is organized into clear, user-friendly sections to help individuals navigate healthier food choices. It begins with an introduction to the guide’s purpose and structure, followed by detailed sections on grocery basics, food categories, and shopping tips. The guide categorizes foods into core groups such as proteins, vegetables, fruits, whole grains, and dairy products, providing recommendations for each. It also includes meal planning strategies and tips for avoiding processed foods. Additional sections address dietary restrictions and preferences, offering options for vegetarian, vegan, low-carb, and keto diets, as well as advice for managing food allergies. The guide concludes with resources for further support, ensuring a comprehensive approach to healthy grocery shopping and eating.

Grocery Guide Basics

The Nutrisystem Grocery Guide provides essential tips and strategies for effective grocery shopping, helping users make informed choices to support their weight loss and healthy eating goals.

Understanding Portion Control in the Nutrisystem Grocery Guide

Portion control is a cornerstone of the Nutrisystem Grocery Guide, emphasizing the importance of managing serving sizes to maintain a balanced diet. By focusing on measured portions, individuals can better regulate calorie intake, ensuring they meet their weight loss goals without feeling deprived. The guide provides clear guidelines on how to identify appropriate serving sizes, often highlighting the difference between a “serving” and a “portion” on nutrition labels. This approach helps users avoid overeating and makes healthier choices easier. Additionally, the guide encourages mindful eating and the use of smaller plates to visually reinforce proper portion sizes. Mastering portion control not only supports weight management but also promotes long-term healthy eating habits, making it a vital skill for sustained success.

The Importance of Meal Planning

Meal planning is a vital component of the Nutrisystem Grocery Guide, helping users make informed, healthy choices while grocery shopping. By creating a structured plan, individuals can ensure they purchase only what they need, reducing food waste and saving money. A well-planned meal schedule also prevents last-minute, unhealthy decisions, such as relying on fast food or processed snacks. The guide encourages setting realistic goals and considering personal dietary needs, like allergies or preferences, when mapping out meals. This approach not only streamlines grocery shopping but also ensures that meals are balanced and nutritious. Effective meal planning is key to staying on track with weight loss and maintaining healthy eating habits long-term.

Core Principles of the Nutrisystem Grocery Guide

The Nutrisystem Grocery Guide is built on core principles that emphasize balanced nutrition, portion control, and mindful shopping. It encourages users to focus on whole, nutrient-dense foods while avoiding processed and high-calorie items. The guide promotes a structured approach to grocery shopping, helping individuals stick to their dietary goals. By prioritizing lean proteins, colorful vegetables, and whole grains, it supports sustainable weight loss and overall health. Additionally, the guide provides practical tips for reading nutrition labels and making informed decisions. These principles are designed to empower users with the knowledge and tools needed to maintain healthy eating habits beyond their weight loss journey, fostering long-term wellness and confidence in the kitchen.

Food Categories in the Nutrisystem Grocery Guide

The guide categorizes foods into proteins, vegetables, fruits, whole grains, and dairy, providing clear recommendations for each to support balanced nutrition and weight management goals.

Protein Sources: What to Buy

The Nutrisystem Grocery Guide emphasizes lean protein sources to support weight loss and overall health. Opt for chicken, turkey, fish, tofu, and legumes, as these are versatile and nutrient-rich. When shopping, choose lean cuts of meat and avoid processed options like hot dogs or sausages, which are high in sodium and preservatives. For plant-based proteins, beans, lentils, and low-fat dairy are excellent choices. The guide also provides portion control tips, ensuring you stay on track with your dietary goals. By selecting the right proteins, you can maintain muscle mass while shedding pounds, aligning with Nutrisystem’s balanced approach to nutrition and wellness.

Vegetables: Recommended Choices

The Nutrisystem Grocery Guide highlights non-starchy vegetables as ideal for weight loss, providing essential nutrients and fiber while keeping calorie intake low. Opt for leafy greens like spinach, kale, and broccoli, as well as colorful options such as bell peppers, carrots, and tomatoes. These vegetables are rich in vitamins, minerals, and antioxidants, supporting overall health. Starchy vegetables like potatoes and corn should be consumed in moderation due to their higher carb content. The guide encourages incorporating a variety of vegetables into meals and snacks to enhance satiety and ensure a balanced diet. By focusing on these recommended choices, you can maintain a nutrient-dense eating plan that aligns with Nutrisystem’s weight loss goals.

Fruits: Best Options for Weight Loss

Fruits are naturally sweet and nutritious, making them excellent choices for weight loss. The Nutrisystem Grocery Guide recommends focusing on low-calorie, high-fiber fruits such as berries, citrus fruits, and apples. These options help control hunger and provide essential vitamins and antioxidants. Tropical fruits like mangoes and pineapples, though nutritious, should be consumed in smaller portions due to their higher sugar content. Incorporating a variety of fruits into your diet adds flavor and satisfaction, supporting your weight loss journey while maintaining a balanced intake of nutrients. By choosing the right portions and types of fruits, you can enjoy their benefits without compromising your goals.

Whole Grains: Healthy Selections

Whole grains are a cornerstone of a healthy diet, offering essential nutrients, fiber, and sustained energy. The Nutrisystem Grocery Guide emphasizes choosing whole grains like oats, quinoa, brown rice, and whole-wheat bread for their high fiber content, which aids digestion and keeps you fuller longer. These grains are rich in vitamins, minerals, and antioxidants, supporting overall health and metabolism. Opt for 100% whole-grain products to avoid added sugars and artificial ingredients. Incorporating these grains into meals helps balance your diet, promoting weight loss and improved well-being. Always check labels to ensure the product is free from refined flours and unnecessary additives, ensuring you make the best choices for your health goals.

Dairy Products: Low-Fat and Nutritious Options

Dairy products are a vital part of a balanced diet, providing essential calcium, protein, and vitamins. The Nutrisystem Grocery Guide recommends selecting low-fat or fat-free dairy options to reduce calorie intake while maintaining nutritional benefits. Choose items like skim milk, Greek yogurt, and reduced-fat cheese to enjoy the advantages of dairy without excess fat. These products support bone health and muscle strength, making them ideal for weight management. When shopping, opt for unflavored and unsweetened varieties to avoid added sugars. Incorporating these low-fat dairy choices into your meals can enhance your diet’s nutritional profile, aiding in weight loss and overall well-being. Always check labels to ensure the products align with your health goals and dietary preferences.

Shopping Tips from the Nutrisystem Grocery Guide

Dairy products are a vital part of a balanced diet, providing essential calcium, protein, and vitamins. The Nutrisystem Grocery Guide recommends selecting low-fat or fat-free dairy options to reduce calorie intake while maintaining nutritional benefits. Choose items like skim milk, Greek yogurt, and reduced-fat cheese to enjoy the advantages of dairy without excess fat. These products support bone health and muscle strength, making them ideal for weight management. When shopping, opt for unflavored and unsweetened varieties to avoid added sugars. Incorporating these low-fat dairy choices into your meals can enhance your diet’s nutritional profile, aiding in weight loss and overall well-being. Always check labels to ensure the products align with your health goals and dietary preferences.

How to Read Nutrition Labels

Reading nutrition labels is essential for making informed choices. Start by checking the serving size and total servings per container to understand calorie intake. Focus on macronutrients like protein, carbohydrates, and fats, and aim for options low in added sugars and unhealthy fats. Pay attention to daily value percentages to ensure you’re meeting nutritional needs without exceeding limits. Look for labels highlighting whole grains, fiber, and essential vitamins. Be mindful of sodium content, especially for heart health. Comparing labels between brands can help you select healthier alternatives. Always prioritize products with fewer ingredients and avoid those with artificial additives. This practice aligns with the Nutrisystem Grocery Guide’s emphasis on mindful eating and balanced nutrition, supporting your weight loss and overall well-being goals. Stay informed to make the best choices for your health.

Avoiding Processed Foods

Avoiding processed foods is a key strategy in the Nutrisystem Grocery Guide to promote healthier eating and weight loss. Processed foods often contain high amounts of added sugars, unhealthy fats, and sodium, which can hinder progress. Identify processed foods by checking ingredient lists for unfamiliar terms or excessive additives. Opt for whole, unprocessed foods like fruits, vegetables, lean proteins, and whole grains. Understanding nutrition labels can help you make better choices by recognizing unhealthy ingredients. Limit foods with artificial preservatives or flavor enhancers. Instead, focus on natural, nutrient-dense options that support your dietary goals. Avoiding processed foods not only aids in weight management but also contributes to overall better health and energy levels, aligning with the guide’s mission to simplify healthy grocery shopping and meal planning. Stay mindful of what you consume to achieve lasting results.

Shopping for Healthy Snacks

Shopping for healthy snacks is essential for maintaining a balanced diet and supporting weight loss goals. The Nutrisystem Grocery Guide emphasizes choosing nutrient-dense snacks that are low in added sugars, unhealthy fats, and excessive sodium. Opt for whole foods like fruits, nuts, and vegetables, which provide natural energy and satisfaction. When selecting packaged snacks, read nutrition labels carefully to ensure they align with your dietary needs. Prioritize snacks high in fiber and protein to keep you fuller longer. Avoid processed snacks with artificial ingredients or high calorie content. Healthy snack options include fresh fruit, raw nuts, veggie sticks with hummus, and air-popped popcorn. Planning your snacks in advance helps prevent impulsive, unhealthy choices. By making informed decisions, you can enjoy delicious, nutritious snacks that support your weight loss journey and overall well-being.

Meal Planning Strategies

Effective meal planning involves creating a weekly schedule, sticking to your grocery list, and preparing balanced meals to maintain healthy habits and support weight loss goals successfully.

Creating a Weekly Meal Plan

A weekly meal plan is essential for staying organized and ensuring healthy, balanced meals. Start by listing breakfast, lunch, dinner, and snack options for each day, considering your dietary needs and preferences. Use the Nutrisystem Grocery Guide to select nutrient-dense foods and portion-controlled servings. Plan meals around seasonal produce and what’s on sale to save money. Write down recipes or cooking methods to avoid last-minute takeouts. Stick to your plan by prepping ingredients or cooking in advance. This approach helps reduce food waste, saves time, and keeps you on track with your weight loss and health goals. A well-structured meal plan is a key component of the Nutrisystem program, promoting consistency and success.

Sticking to Your Grocery List

Sticking to your grocery list is crucial for maintaining healthy eating habits and avoiding impulse purchases. The Nutrisystem Grocery Guide recommends planning your shopping trip in advance, ensuring you only buy what’s necessary for your meal plan. Before heading to the store, review your list and organize it by food categories to save time. Avoid distractions by focusing solely on the items you need. This approach helps you stay within your budget and prevents temptation from processed or high-calorie foods. By adhering to your list, you’ll make healthier choices and stay on track with your weight loss goals. Consistency is key, and a well-planned grocery list serves as your roadmap for success.

Cooking at Home: Tips for Success

Cooking at home is a cornerstone of the Nutrisystem Grocery Guide, allowing you to control ingredients and portion sizes. Start by planning meals for the week, ensuring you have all necessary ingredients. Simple, healthy recipes can be found in the guide or online, saving time and effort. Use fresh, whole foods whenever possible, and avoid processed items. Incorporate leftovers to reduce waste and streamline meal prep. Keep your kitchen organized with essential tools like measuring cups and a food scale. Experiment with spices and herbs for flavor without added calories. Staying consistent with home-cooked meals ensures you stick to your weight loss goals while developing a lifelong healthy habit. Utilize Nutrisystem’s resources for recipe ideas and cooking tips to keep your meals exciting and nutritious.

Dietary Restrictions and Preferences

The Nutrisystem Grocery Guide accommodates various dietary needs, including vegetarian, vegan, low-carb, and keto options, ensuring personalized meal plans that align with individual preferences and restrictions for weight loss success.

Vegetarian and Vegan Options

The Nutrisystem Grocery Guide offers tailored support for vegetarian and vegan diets, emphasizing plant-based protein sources like tofu, tempeh, and legumes. It highlights whole grains, fruits, and vegetables, ensuring balanced nutrition. The guide helps users identify vegan-friendly alternatives to dairy and meat, providing clear labels and suggestions. Meal plans are designed to avoid animal-derived ingredients, focusing on wholesome, nutrient-rich foods. By incorporating these options, the guide supports weight loss while catering to ethical and dietary preferences, making it easier to maintain a plant-based lifestyle without compromising on flavor or variety. This section ensures that vegetarians and vegans can enjoy delicious, satisfying meals while adhering to their dietary choices.

Low-Carb and Keto-Friendly Choices

The Nutrisystem Grocery Guide provides specific guidance for those following low-carb or keto diets, focusing on high-protein, low-sugar foods. It recommends lean meats, fish, and eggs, while emphasizing low-carb vegetables like leafy greens and broccoli. Healthy fats such as avocados, nuts, and olive oil are also highlighted. The guide assists in identifying hidden carbs in processed foods, offering keto-friendly alternatives to traditional snacks. By prioritizing whole, nutrient-dense foods, it supports weight loss and metabolic health. This section ensures that individuals can maintain their dietary preferences while enjoying variety and flavor, making it easier to stick to their low-carb or keto lifestyle without sacrificing nutrition or taste.

Managing Food Allergies

The Nutrisystem Grocery Guide offers tailored advice for individuals with food allergies, ensuring safe and enjoyable dietary choices. It emphasizes label reading to identify allergens like gluten, dairy, and nuts. Shoppers are guided to select hypoallergenic alternatives, such as gluten-free grains and plant-based dairy substitutes. The guide also suggests avoiding processed foods, which often contain hidden allergens, and opting for whole, unprocessed ingredients. Additionally, it provides strategies for meal planning to accommodate common allergies, ensuring nutrition remains balanced and varied. By focusing on clear guidelines and safe substitutions, the guide helps individuals with allergies navigate grocery shopping confidently, maintaining their health and dietary goals without compromising on taste or nutrition.

Additional Resources and Support

The Nutrisystem Grocery Guide connects users to a community forum, expert recipes, and nutritionist consultations for personalized guidance, enhancing their weight-loss journey with tailored support and resources.

Nutrisystem Community and Forums

The Nutrisystem Community and Forums provide a supportive space for users to connect, share experiences, and gain motivation. Members can engage in discussions, ask questions, and exchange tips for success. The community fosters accountability and encouragement, helping users stay on track with their weight-loss goals. With stories of progress and advice from fellow members, the forums offer a sense of belonging and shared purpose. Whether seeking inspiration or practical advice, the community is a valuable resource for anyone using the Nutrisystem Grocery Guide. It’s a place to celebrate milestones and overcome challenges together, making the journey to healthier eating more enjoyable and sustainable.

Recipes and Cooking Ideas

Nutrisystem offers a variety of delicious and nutritious recipes to help users prepare meals that align with their weight-loss goals. These recipes focus on balanced nutrition, incorporating proteins, vegetables, whole grains, and healthy fats. The cooking ideas are designed to be easy to follow, using ingredients from the Nutrisystem Grocery Guide. Whether you’re looking for breakfast options, midday snacks, or hearty dinners, the recipes provide creative ways to stay on track without sacrificing flavor; Many recipes are tailored to accommodate different dietary preferences and restrictions, ensuring everyone can enjoy tasty, wholesome meals. By exploring these recipes, users can keep their meal plans exciting and diverse, making the weight-loss journey more enjoyable and sustainable.

Consulting with a Nutritionist

Consulting with a nutritionist can provide personalized guidance to enhance your weight-loss journey with the Nutrisystem Grocery Guide. A nutritionist can help tailor meal plans to your specific needs, preferences, and health goals. They offer expert advice on portion control, meal balancing, and making the most of the grocery guide’s recommendations. Whether you have dietary restrictions or unique preferences, a nutritionist can help you navigate the guide effectively. This collaboration ensures you maximize the benefits of the program while maintaining a balanced and nutritious diet. By combining professional insights with the structured approach of the Nutrisystem Grocery Guide, you can achieve sustainable weight loss and improve your overall health. This resource is invaluable for those seeking customized support and motivation.

The Nutrisystem Grocery Guide empowers users to make informed food choices, promoting healthy weight loss and balanced nutrition through structured grocery lists and meal planning strategies.

Benefits of Using the Nutrisystem Grocery Guide

The Nutrisystem Grocery Guide offers numerous benefits, helping users make informed food choices that align with their weight loss and health goals. By providing structured grocery lists and meal plans, it simplifies shopping and meal preparation, ensuring balanced nutrition. The guide emphasizes portion control, reducing guesswork and promoting healthier eating habits. It also educates users on nutrient-dense foods, fostering better dietary decisions. Over time, this approach can lead to sustainable weight management and improved overall health. Additionally, the guide supports long-term lifestyle changes, making it easier to maintain healthy habits beyond the program. Its user-friendly design and practical advice make it a valuable tool for anyone seeking to enhance their nutrition and well-being.

Final Tips for Success

To achieve lasting success with the Nutrisystem Grocery Guide, stay committed to your meal plan and grocery list. Plan meals in advance to avoid last-minute, unhealthy choices. Shop the store’s perimeter for fresh produce, lean proteins, and whole grains, while avoiding processed foods. Track your progress regularly to stay motivated and celebrate small milestones. Adjust your choices as needed to maintain balance and variety. By consistently applying these strategies, you’ll not only meet your weight loss goals but also adopt healthier, sustainable eating habits for the long term.

roman catholic funeral mass order of service pdf

The Roman Catholic Funeral Mass is a sacred ritual honoring the deceased‚ offering prayers for their soul‚ and providing comfort to mourners. It follows a structured order of service‚ emphasizing liturgical traditions and the hope of resurrection.

Overview of the Funeral Mass

The Roman Catholic Funeral Mass is a solemn yet hopeful celebration that honors the life of the deceased while expressing faith in eternal life. It follows a structured order of service‚ beginning with introductory rites‚ including the sprinkling of holy water and the placement of the pall. The Liturgy of the Word features readings from Scripture‚ a responsorial psalm‚ and a Gospel passage‚ followed by a homily. The Liturgy of the Eucharist includes the consecration and communion‚ emphasizing unity with the deceased and the community of saints. The Mass concludes with final prayers‚ a recessional hymn‚ and the procession to the place of burial. Black or violet vestments are typically worn‚ though white may be used for children. The Mass provides comfort to mourners‚ celebrating the deceased’s life while praying for their soul’s mercy and eternal peace.

Significance in Catholic Tradition

The Roman Catholic Funeral Mass holds profound significance as a celebration of faith‚ hope‚ and resurrection. It is rooted in the belief that the soul continues its journey toward eternal life‚ and the Mass serves as a powerful prayer for the deceased’s eternal rest. The order of service reflects the Church’s rich liturgical traditions‚ emphasizing the community’s unity in mourning and hope. The Mass is seen as a means to intercede for the soul‚ seeking God’s mercy and forgiveness. It also provides comfort to the bereaved‚ reinforcing the promise of eternal life. The use of specific rituals‚ such as the sprinkling of holy water and the placement of the pall‚ symbolizes baptismal renewal and the dignity of the deceased. The Funeral Mass is a cornerstone of Catholic tradition‚ blending sorrow with hope and offering solace through prayer and sacrament.

Order of Service for the Funeral Mass

The Funeral Mass follows a structured sequence‚ beginning with Introductory Rites‚ followed by the Liturgy of the Word‚ Liturgy of the Eucharist‚ and Concluding Rites‚ all deeply rooted in Catholic tradition.

Introductory Rites

The Introductory Rites of the Roman Catholic Funeral Mass begin with the gathering of the family and mourners at the church entrance. The priest greets the family and leads the procession into the church. Sprinkling with Holy Water often occurs‚ symbolizing purification and the deceased’s baptismal vows. The casket or urn is then adorned with a white pall‚ reminding all of the equality of all baptized Christians. This rite concludes with the Entrance Procession‚ accompanied by sacred music‚ setting the tone for the liturgy. These rituals emphasize hope‚ faith‚ and the community’s support for the grieving family. The Introductory Rites are a solemn yet comforting beginning to the Funeral Mass.

Liturgy of the Word

The Liturgy of the Word is a central part of the Roman Catholic Funeral Mass‚ offering comfort and hope through sacred Scripture. It begins with a First Reading from the Old Testament‚ chosen for its themes of God’s mercy and the promise of eternal life. A Responsorial Psalm follows‚ typically sung‚ expressing trust in divine providence. The Second Reading‚ from the New Testament‚ emphasizes resurrection and eternal life. The Gospel Reading is optional but powerful‚ highlighting Christ’s teachings on love and redemption. Family members or friends may read the first and second readings‚ while the priest proclaims the Gospel. The Homily reflects on the deceased’s life‚ the readings‚ and the hope of resurrection. This liturgical segment strengthens faith and consoles the grieving‚ reminding all of God’s enduring love and the promise of eternal peace.

Liturgy of the Eucharist

The Liturgy of the Eucharist is the heart of the Funeral Mass‚ where the bread and wine are consecrated into the Body and Blood of Christ. It begins with the Preparation of the Gifts‚ where the altar is readied with the offerings. The priest leads the Prayer Over the Offerings‚ asking God to accept the sacrifices for the deceased and the living. The Eucharistic Prayer follows‚ invoking the Holy Spirit and recalling Christ’s sacrifice. The Memorial Acclamation and Great Amen emphasize the community’s faith. The Communion Rite includes the Lord’s Prayer and the Breaking of the Bread‚ symbolizing unity with the deceased and the entire Church. The Eucharist nourishes the faithful‚ reinforcing the belief in the resurrection and eternal life‚ and provides spiritual strength to those mourning. This sacred ritual deepens the connection between the deceased‚ the family‚ and the divine.

Communion Rites

The Communion Rites are a solemn and intimate part of the Funeral Mass‚ emphasizing unity with the deceased and the entire Church. After the Liturgy of the Eucharist‚ the priest leads the faithful in the Lord’s Prayer‚ followed by the Breaking of the Bread‚ which symbolizes Christ’s body given for all. The Communion Antiphon is sung as the priest and congregation prepare to receive the Eucharist. The distribution of Holy Communion provides spiritual nourishment and comfort to the mourners‚ reinforcing the belief in eternal life. Family members and friends may receive Communion in remembrance of their loved one. This sacred moment strengthens the bond between the living and the deceased‚ expressing hope in the resurrection and eternal unity with God.

Concluding Rites

The Concluding Rites bring the Funeral Mass to a meaningful close‚ offering final prayers and farewells. The priest leads the congregation in the Prayer of Commendation‚ entrusting the soul of the deceased to God’s mercy. This is followed by the Prayer over the People‚ invoking blessings on the mourners. The Final Commendation emphasizes the hope of resurrection‚ and the Song of Farewell is sung as the casket or urn is prepared for procession. The priest and congregation make the Sign of the Cross‚ symbolizing protection and faith. The Recessional Hymn accompanies the family and casket as they exit the church‚ marking the transition to the burial or final rest. These rites provide closure and reassurance‚ reaffirming the Catholic belief in eternal life and the community’s support for the grieving family.

Key Components of the Funeral Mass

The Funeral Mass includes essential elements like the Introductory Rites‚ Liturgy of the Word‚ Liturgy of the Eucharist‚ and Concluding Rites. These components honor the deceased and provide spiritual comfort to the mourners.

The Role of the Priest and Participants

The priest plays a central role in the Funeral Mass‚ leading the congregation in prayer‚ presiding over the Eucharist‚ and providing spiritual guidance. They deliver the homily‚ offering reflections on the deceased’s life and eternal rest. Participants‚ including family members and mourners‚ actively engage by responding to prayers‚ singing hymns‚ and performing specific roles such as reading Scripture or presenting the gifts. The choir or musicians support the liturgy with appropriate music. The family may also designate individuals to fulfill roles like pallbearers or readers‚ personalizing the service while adhering to tradition. Together‚ the priest and participants create a meaningful celebration of the deceased’s life‚ emphasizing hope and faith in resurrection.

Readings and Prayers

The Funeral Mass incorporates sacred readings and prayers to honor the deceased and seek divine mercy. The liturgy typically includes an Old Testament reading‚ a responsorial psalm‚ and a Gospel reading‚ carefully selected to reflect hope‚ resurrection‚ and eternal life. Family members or friends often fulfill the role of readers‚ adding a personal touch to the service. The Prayer of the Faithful‚ led by the priest‚ petitions God for the deceased’s soul and the comfort of the bereaved. These prayers and readings are chosen from the Order of Christian Funerals‚ ensuring alignment with Catholic tradition and doctrine. They serve as a source of solace and spiritual strength for all in attendance‚ emphasizing the belief in eternal life and the communion of saints.

Musical Elements and Hymns

Music holds a vital role in the Roman Catholic Funeral Mass‚ offering solace and expressing faith. Hymns such as “Be Not Afraid‚” “On Eagle’s Wings‚” and “Amazing Grace” are commonly chosen for their comforting and uplifting messages. The responsorial psalm‚ typically sung‚ reflects themes of hope and resurrection. Musical elements are carefully selected to align with the liturgical season and the deceased’s preferences. A choir or instrumentalist may accompany the congregation‚ enhancing the solemnity and beauty of the service. Singing is encouraged as it unites the assembly in prayer and praise. The music serves as a powerful expression of Catholic faith‚ emphasizing the belief in eternal life and the resurrection. It also provides a meaningful way to honor the deceased while offering spiritual comfort to mourners.

Symbolic Gestures and Rituals

The Roman Catholic Funeral Mass incorporates numerous symbolic gestures and rituals‚ each carrying profound meaning. The sprinkling of holy water on the casket or urn signifies purification and baptismal renewal. The placement of the pall‚ a white cloth‚ reminds all of the deceased’s baptism and equality before God. The Sign of the Cross and incensing of the casket are performed to honor the body and seek divine mercy. These rituals‚ rooted in tradition‚ provide spiritual comfort and reinforce the belief in eternal life. They are integral to the liturgy‚ offering a way to express faith and pay respects to the deceased.

Planning and Preparation

Proper planning ensures the Funeral Mass reflects the deceased’s faith and family’s wishes. It involves selecting readings‚ music‚ and participants‚ guided by Catholic traditions and liturgical norms.

Choosing Appropriate Readings and Music

Selecting suitable readings and music for a Roman Catholic Funeral Mass is a meaningful way to honor the deceased while aligning with liturgical traditions. The Order of Christian Funerals provides options for Old and New Testament readings‚ a responsorial psalm‚ and a Gospel passage. Family members or friends often participate by reading or singing‚ adding a personal touch. Music should be sacred and reflective‚ with hymns that express hope‚ comfort‚ and resurrection. The priest reviews all choices to ensure they align with Catholic teachings and the solemnity of the occasion. This thoughtful preparation helps create a dignified and spiritually uplifting celebration of the deceased’s life.

Family Participation and Personalization

Family involvement is a meaningful aspect of the Roman Catholic Funeral Mass‚ allowing loved ones to honor the deceased personally. Family members or friends may be designated to read Old or New Testament passages‚ the responsorial psalm‚ or offer prayers. This participation not only deepens the connection to the liturgy but also provides comfort. The selection of readings and music can reflect the deceased’s life and faith‚ offering a personalized tribute. Additionally‚ the family may choose to include a eulogy or personal reflections‚ though traditionally‚ these are more appropriate during the Vigil or Prayer Service before the Mass. This personalization ensures the funeral liturgy is both a celebration of the deceased’s life and a solemn expression of Catholic faith and tradition.

Templates and Resources for the Order of Service

Templates and resources for the Roman Catholic Funeral Mass are widely available to guide families in planning the liturgy. Many parishes provide downloadable PDF templates that outline the order of service‚ including sections for readings‚ prayers‚ and hymns. These templates often feature customizable fields for personalizing the service with the deceased’s name‚ dates‚ and selected passages. Churches like All Saints Roman Catholic Church offer detailed examples‚ ensuring the liturgy aligns with Catholic traditions. Families can also find resources online‚ such as Microsoft Word templates for funeral booklets‚ which include sections for photos‚ symbols‚ and procession details. These tools help streamline the planning process‚ ensuring the Mass is both reverent and meaningful. Additionally‚ priests and funeral directors often assist in finalizing the order of service‚ ensuring it reflects the deceased’s life and faith. These resources are invaluable for families seeking to honor their loved ones with dignity and accordance with Catholic teachings.

shock doctor gel mouthguard instructions

The Shock Doctor Gel Mouthguard is a popular choice for athletes seeking superior protection during sports. Its unique gel technology provides a custom fit, ensuring comfort and durability. This guide will walk you through the proper fitting, maintenance, and care of your gel mouthguard, helping you maximize its performance and longevity. By following these instructions, you can ensure optimal protection and confidence during your activities.

Understanding the Product

The Shock Doctor Gel Mouthguard is designed to provide superior protection for athletes during contact sports. It features a gel liner that conforms to the shape of your mouth and teeth for a snug, customizable fit. The mouthguard is constructed with a durable rubber base that absorbs impact and protects against injuries to the teeth, gums, and jaw. The gel material is soft and flexible, ensuring comfort during wear. It also includes a built-in breathing channel to enhance airflow, allowing for easy breathing during intense activities. The mouthguard comes with a protective case for storage and transportation, keeping it clean and organized when not in use. The gel technology ensures a secure fit, reducing the risk of the mouthguard shifting during play. This product is ideal for athletes who prioritize both safety and performance. Understanding its design and features is key to using it effectively.

Fitting Instructions

Submerge the mouthguard in boiling water for 30 seconds, then let it cool slightly. Bite down gently to shape it around your teeth. Avoid excessive chewing to prevent distortion. Once set, the mouthguard should fit snugly.

3.1 Initial Fitting Process

To begin, ensure the mouthguard is at room temperature. Bring a pot of water to a boil, then carefully submerge the mouthguard for 20-30 seconds. Remove it with a spoon and let it cool for 5-10 seconds. Place it in your mouth, aligning it with your upper teeth. Bite down gently but firmly to mold the gel around your teeth and gums. Hold this position for 10-15 seconds to set the shape. Remove it and rinse with cold water to stop the cooling process. If needed, repeat the steps for a better fit. Avoid overheating or chewing excessively, as this can distort the mouthguard. Proper fitting ensures maximum protection and comfort during use. This step is crucial for achieving a custom-like fit tailored to your dental structure.

3.2 Making Adjustments

If the initial fit isn’t perfect, adjustments can be made to ensure comfort and proper protection. Start by inspecting the mouthguard for any excess gel that may cause discomfort. Use sharp scissors to carefully trim any overhanging or bulky areas, taking care not to remove too much material. If the fit feels too tight, you can repeat the molding process by reheating the mouthguard in warm water for 10-15 seconds and reshaping it. Avoid overheating, as this can damage the gel. Once adjusted, test the fit by speaking and breathing to ensure it doesn’t impede your ability to communicate or inhale. Fine-tuning the mouthguard in this way ensures a balance of protection and comfort, tailoring it to your specific needs for optimal performance during sports activities. Regular checks and minor tweaks can maintain its effectiveness over time.

3.3 Ensuring a Proper Fit

A proper fit is crucial for both comfort and protection. After the initial fitting and any necessary adjustments, test the mouthguard by speaking, breathing, and moving your jaw. It should feel secure and not shift during these movements. Check for even coverage over your teeth and gums, ensuring there are no gaps or areas where the mouthguard doesn’t make contact. A well-fitted mouthguard should allow you to speak clearly and breathe easily. If you notice any discomfort or looseness, revisit the molding or adjustment steps. Avoid overheating the gel, as this can compromise its structure. Regularly inspect the mouthguard for wear and tear, and replace it if it shows significant signs of damage. A proper fit ensures maximum protection, comfort, and confidence during sports activities, making it essential to take the time to get it right.

Cleaning and Maintenance

Proper cleaning and maintenance are essential to extend the life of your Shock Doctor Gel Mouthguard and ensure hygiene. After each use, rinse the mouthguard under cold water to remove dirt and saliva. Use a mild soap or toothpaste with a soft-bristle toothbrush to gently scrub away any stubborn stains or residue. Avoid using hot water, as it may deform the gel. Do not soak the mouthguard in mouthwash or harsh chemicals, as this can degrade the material. Allow the mouthguard to air-dry completely before storing it in a protective case. Regular cleaning prevents bacterial growth and keeps the mouthguard fresh. Inspect the mouthguard regularly for signs of wear or damage. If it becomes misshapen or develops tears, replace it immediately to maintain proper protection. Proper care ensures your mouthguard remains comfortable, functional, and hygienic for optimal performance during sports activities.

Storage and Transportation

Proper storage and transportation of your Shock Doctor Gel Mouthguard are crucial to maintain its shape and functionality. After cleaning, store the mouthguard in a protective case to prevent bending or deformation. Avoid exposing it to extreme temperatures, such as leaving it in a hot car or direct sunlight, as this can warp the gel. When transporting, ensure the case is secure and padded to minimize movement. Do not store the mouthguard in a damp environment, as it may encourage mold growth. For travel, consider using a hard-shell case with a clip or carabiner for easy attachment to bags. Always inspect the mouthguard before use to ensure it remains undamaged and ready for action. Proper storage and transportation will extend the lifespan of your mouthguard and ensure it continues to provide optimal protection during sports.

Troubleshooting Common Issues

Common issues with the Shock Doctor Gel Mouthguard include improper fit or the mouthguard not staying in place. To resolve, ensure proper fitting and readjust as needed. If issues persist, consult customer support for assistance.

6.1 Resolving Fit Issues

If your Shock Doctor Gel Mouthguard doesn’t fit properly, start by re-boiling the mouthguard and re-molding it to your teeth. Ensure the mouthguard is soft and pliable before molding. If it still feels loose, check for excess gel that may need trimming. Proper alignment is key—make sure the mouthguard sits correctly over your upper teeth. If issues persist, consult the manufacturer’s guidelines or contact customer support for further assistance. Regularly inspect the mouthguard for wear and tear, as this can affect its fit over time. By addressing fit issues promptly, you can maintain optimal protection and comfort during use.

6.2 Addressing Performance Problems

If your Shock Doctor Gel Mouthguard isn’t performing optimally, inspect for wear or misalignment. Common issues include shifting during use or inadequate cushioning. Ensure the mouthguard is properly fitted and molded to your teeth; If it shifts, re-boil and re-mold it, focusing on achieving a snug fit. Check the gel layer for thickness; overly worn areas may compromise protection. Clean the mouthguard regularly to prevent debris buildup, which can affect performance. For persistent issues, consider consulting the manufacturer or replacing the mouthguard if it’s past its usable lifespan. Regular inspections and proper care can help maintain its effectiveness. Addressing these problems ensures the mouthguard provides the protection and comfort you need during sports activities.

Safety Considerations

Ensuring the safe use of your Shock Doctor Gel Mouthguard is crucial for effective protection and comfort. Always inspect the mouthguard before use for any signs of wear, such as thinning gel or cracks, which could compromise its protective qualities. Avoid chewing on the mouthguard, as this can damage the structure and reduce its effectiveness. If the mouthguard causes discomfort or obstructs breathing or speaking, discontinue use and consult a dentist or orthodontist for adjustments. Store the mouthguard in its protective case when not in use to prevent damage or contamination. Never use the mouthguard beyond its recommended lifespan, as this can lead to reduced performance. By adhering to these safety guidelines, you can ensure the mouthguard functions as intended and provides reliable protection during sports activities.

Benefits of Using a Gel Mouthguard

A gel mouthguard, like the Shock Doctor Gel Mouthguard, offers numerous benefits for athletes. Its gel technology provides a custom-like fit, ensuring maximum comfort and protection during sports. The gel absorbs impact effectively, reducing the risk of dental injuries and concussions. Unlike traditional mouthguards, the gel material is less bulky, allowing for easier breathing and speaking. It also stays securely in place, minimizing distractions during gameplay. The gel composition is durable and resistant to tears, offering long-lasting protection. Additionally, the mouthguard is easy to clean and maintain, making it a practical choice for frequent use. By providing superior comfort and protection, the Shock Doctor Gel Mouthguard helps athletes perform at their best while safeguarding their dental health. Its unique design and advanced materials make it a top choice for athletes across various sports.

Compliance with Sports Regulations

The Shock Doctor Gel Mouthguard is designed to meet the safety standards of various sports organizations, ensuring compliance with regulations. It is widely accepted in high-impact sports, including football, hockey, and martial arts, where mouth protection is mandatory. The mouthguard is constructed with materials that meet or exceed standards set by organizations like the American Dental Association (ADA) and the American Society for Testing and Materials (ASTM). Its BPA-free composition aligns with health and safety regulations, making it suitable for athletes of all ages. By using the Shock Doctor Gel Mouthguard, athletes can comply with league requirements while benefiting from advanced protection. Always check with your specific sport or organization to confirm acceptance, as regulations may vary. This mouthguard is a reliable choice for meeting compliance and ensuring safety during competition.

Comparing Gel vs. Other Mouthguard Types

The Shock Doctor Gel Mouthguard stands out among other mouthguard types due to its unique gel composition. Unlike custom-fit mouthguards, which require dental impressions, the gel mouthguard offers a universal fit that molds to the user’s teeth during the fitting process. It is more durable than stock mouthguards and provides better protection than boil-and-bite models. The gel material absorbs impact effectively, reducing the risk of dental injuries. Additionally, the gel mouthguard is more affordable than custom options while still offering superior comfort and protection. Its BPA-free design ensures safety, making it a popular choice for athletes in high-impact sports like football and hockey. When compared to other types, the gel mouthguard strikes a balance between cost, comfort, and performance, making it a versatile option for a wide range of needs.

Customization Options

The Shock Doctor Gel Mouthguard offers several customization options to cater to individual preferences and needs. Users can choose from a variety of colors, allowing for personalization that matches team colors or personal style. Additionally, the gel mouthguard can be trimmed to fit smaller mouths or specific dental requirements, ensuring a more tailored fit. While it does not require a custom dental impression like some other mouthguards, the gel material molds to the user’s teeth during the fitting process, creating a personalized fit. Some models also feature adjustable straps or pouches for added comfort. Furthermore, the mouthguard is available in different sizes, including youth and adult versions, making it suitable for a wide range of users. These customization options enhance the overall experience, ensuring the mouthguard meets individual needs without compromising on protection or performance.

User Reviews and Feedback

Users of the Shock Doctor Gel Mouthguard have shared a variety of experiences, highlighting both its strengths and areas for improvement. Many reviewers praise the mouthguard for its comfort and ability to provide excellent protection during high-impact sports. The gel material is often commended for its ability to mold to the teeth, offering a snug and secure fit. However, some users have noted that the fit can be inconsistent, particularly for those with specific dental alignments or smaller mouths. A few customers have also mentioned that the mouthguard may lose its shape over time with frequent use. Despite these concerns, the majority of feedback emphasizes the product’s durability and effectiveness in preventing injuries. Overall, the Shock Doctor Gel Mouthguard is well-regarded for its performance, though individual experiences may vary based on personal preferences and needs.

The Shock Doctor Gel Mouthguard is a reliable and durable option for athletes seeking protection during sports. Its gel technology offers a custom fit, providing both comfort and security. While user reviews highlight its effectiveness, proper fitting and maintenance are crucial to ensure optimal performance. By following the instructions outlined in this guide, users can extend the lifespan of their mouthguard and enjoy uninterrupted protection. Whether you’re a casual player or a professional athlete, the Shock Doctor Gel Mouthguard is a solid choice for safeguarding your oral health. Remember to always prioritize proper care and storage to maintain its quality and effectiveness over time.

Tips for Optimal Use

To get the most out of your Shock Doctor Gel Mouthguard, consider these practical tips. First, ensure the mouthguard is clean and dry before storage to prevent bacteria buildup. Regularly inspect the gel for signs of wear or distortion, as this can affect its protective qualities. Avoid chewing on the mouthguard, as this can misshape the gel and reduce its effectiveness. For optimal comfort, wear the mouthguard during practice sessions to allow your mouth to adjust to its fit. Additionally, store it in a protective case to prevent accidental damage. Finally, replace the mouthguard if you notice any significant wear or if it no longer fits securely. By following these tips, you can extend the lifespan of your mouthguard and ensure it continues to provide the protection you need during sports activities.

Additional Resources

For further assistance with your Shock Doctor Gel Mouthguard, explore these additional resources. Visit the official Shock Doctor website for detailed product information, instructional videos, and FAQs. Download the user manual provided with your mouthguard for step-by-step guidance. Check out video tutorials on platforms like YouTube, which often feature demonstrations of fitting and care. Contact Shock Doctor customer support directly for personalized advice or troubleshooting. Additionally, consult your dentist or sports coach for recommendations on using mouthguards effectively. For compliance with sports regulations, refer to your league’s official guidelines. Finally, explore forums or review sites to read user experiences and gain insights from others who use the Shock Doctor Gel Mouthguard. These resources will help you maximize your mouthguard’s performance and longevity.

von duprin 99 installation instruction

Von Duprin 99 Series exit devices are renowned for their security, durability, and reliability. Designed with innovative features like the Outdoor Defense option and the cost-effective 70 Series, they provide superior functionality and customizable solutions for various commercial applications, ensuring enhanced safety and compliance with industry standards.

1.1. Overview of Von Duprin 99 Series

The Von Duprin 99 Series is a premium line of exit devices designed for commercial applications, offering exceptional security and durability. Engineered for outdoor environments, this series features the innovative Outdoor Defense option, which protects internal components from moisture and temperature variations. It is part of Allegion US’s commitment to providing advanced security solutions. The 99 Series includes panic bars, electric strikes, and trim products, ensuring reliable performance in high-traffic areas. With a focus on customer-centric innovation, Von Duprin’s 99 Series is tailored for durability and ease of use, making it a trusted choice for commercial door hardware needs. Its robust construction and customizable options ensure it meets diverse application requirements while maintaining superior functionality and aesthetic appeal.

1.2. Key Features and Benefits

The Von Duprin 99 Series offers exceptional durability and security, making it ideal for commercial applications. Its key features include the Outdoor Defense option, which safeguards against moisture and temperature variations, ensuring reliable performance in outdoor environments. The series is engineered with heavy-duty construction and advanced security components, providing long-lasting functionality. Key benefits include ANSI A156.3 Grade 1 certification, ensuring superior quality and reliability. The 99 Series also offers customizable solutions, allowing it to meet diverse application needs while maintaining aesthetic appeal. With its robust design and innovative features, the Von Duprin 99 Series delivers enhanced security and durability, making it a trusted choice for commercial door hardware. Its performance and adaptability ensure compliance with industry standards and provide peace of mind for facility managers and users alike.

Tools and Materials Required

Essential tools include screwdrivers, drill bits, and measuring tape. Materials needed are screws, strike plates, electric strikes, and power supplies for proper installation and functionality.

2.1. List of Necessary Tools

To install Von Duprin 99 Series exit devices, you’ll need a screwdriver set, including both flathead and Phillips-head options, a drill with bits, and a tape measure for accurate placement. A level, either bubble or laser, ensures proper alignment. Prying tools like a utility knife or small pry bar may be useful for removing old hardware. Wrenches or pliers can help tighten components. Safety glasses and gloves are recommended for protection. Additionally, specialized tools, such as an adjustment wrench for fine-tuning the latch bolt, may be provided by the manufacturer. Having these tools on hand will facilitate a smooth and successful installation process.

2.2. Additional Materials Needed

Beyond tools, you’ll need specific materials like Von Duprin 99 Series exit device trim, strike plates, and electric strike components. Ensure you have the correct power supply and relay for electrical connections. Door handles or push bars in matching finishes are essential for functionality and aesthetics. Weatherstripping and door sweeps may be necessary to ensure proper sealing. Adhesive products, such as silicone sealant, can prevent moisture intrusion. Fasteners like screws, bolts, and nuts should be compatible with your door material. Alarm kits may be required for added security features. Verify all components are included in the kit or purchase them separately to avoid delays. Proper materials ensure a secure, reliable, and code-compliant installation of your Von Duprin 99 Series exit device.

Door Preparation

Properly measure and align the door to ensure a precise fit for the Von Duprin 99 Series exit device, ensuring it is level and securely mounted.

3.1. Measuring the Door for Proper Fit

Accurate door measurements are crucial for a seamless Von Duprin 99 Series installation. Measure the door’s width, height, and stile width to determine the correct hardware size. For single doors, ensure the stile is wide enough to accommodate the exit device. Double doors require precise alignment between both leaves. Check the door thickness to confirm compatibility with the device’s mounting requirements. For narrow stiles, consider the Von Duprin 55 Series, while the 99 Series suits standard or wider stiles. Measure the backset (distance from the door edge to the lock’s center) to ensure proper latch alignment. Incorrect measurements can lead to misalignment or poor functionality, so double-check all dimensions before proceeding.

3.2. Ensuring Door Alignment and Leveling

Proper door alignment and leveling are essential for the Von Duprin 99 Series exit device to function correctly. Begin by verifying that the door is evenly aligned with the frame. Use a carpenter’s level to ensure the door is plumb and level. Check the vertical alignment of the door edges and the horizontal alignment of the header and threshold. Misalignment can cause improper latch engagement or strike plate misalignment. If necessary, adjust the door hinges or use shims to achieve proper leveling. Ensure the door swings smoothly without binding, as this can affect the exit device’s performance. Finally, confirm that the door aligns with the strike plate location to ensure proper latch operation. Proper alignment ensures secure and reliable functionality of the Von Duprin 99 Series exit device.

Installation Process

The Von Duprin 99 Series installation involves mounting the exit device, installing the strike plate, and connecting electrical components. Follow manufacturer instructions for secure and durable functionality.

4.1. Mounting the Exit Device

Mounting the Von Duprin 99 Series exit device begins with ensuring the door is properly prepared and aligned. Position the exit device on the door, aligning the push bar with the door’s center. Use the provided templates to mark screw holes for accurate placement. Secure the device using the recommended screws, ensuring a tight fit. For double doors, align the vertical rods or concealed mechanisms to ensure proper operation. Tighten all fasteners firmly but avoid over-tightening, which could damage the hardware. If using the Outdoor Defense option, ensure weather-resistant components are correctly installed to protect against moisture and temperature variations. Double-check the alignment and operation before proceeding to the next steps. Proper mounting ensures reliable functionality and longevity of the exit device. Always follow the manufacturer’s guidelines for secure installation.

4.2. Installing the Strike Plate

Installing the strike plate for the Von Duprin 99 Series exit device is crucial for proper door operation. Locate the strike plate on the door frame, aligning it with the latch bolt or vertical rod. Use the template provided to mark the screw holes accurately. Drill pilot holes if necessary to avoid splitting the frame. Secure the strike plate using the supplied screws, ensuring it is flush with the frame surface. For optimal functionality, ensure the strike plate is aligned with the exit device’s latch bolt. If using an electric strike, connect it according to the wiring diagram. Test the door’s operation to ensure smooth engagement. Proper alignment and secure installation of the strike plate are essential for the durability and reliability of the exit device. Follow the manufacturer’s instructions for precise installation to prevent malfunctions.

4.3. Connecting the Electric Strike

Connecting the electric strike for the Von Duprin 99 Series requires careful attention to wiring and alignment. Begin by mounting the electric strike to the door frame, ensuring it aligns with the latch bolt. Refer to the wiring diagram provided with the device to connect the wires correctly to the power supply. Secure all connections tightly to prevent loose wiring. If using a fail-safe or fail-secure configuration, ensure the wiring matches the desired operation. Test the strike by applying power and checking its response to the latch bolt. Proper connection ensures smooth operation and security. Always follow manufacturer guidelines for wiring configurations to avoid damage or malfunction. Verify the strike’s alignment with the latch bolt for optimal performance. Correct installation is critical for reliable functionality and safety compliance.

4.4. Wiring the Device

Wiring the Von Duprin 99 Series exit device involves connecting the power supply, sensors, and control components. Begin by referencing the provided wiring diagram to identify the correct terminals for each wire. Connect the power supply to the appropriate voltage (typically 12V or 24V DC) and ensure all wires are securely attached to avoid loose connections. For fail-safe or fail-secure configurations, follow the manufacturer’s guidelines to set up the wiring correctly. Ground the device to prevent electrical interference. After wiring, test the device by applying power and verifying its operation. Proper wiring ensures reliable functionality and safety compliance. Always follow the manufacturer’s instructions for specific configurations and voltage requirements to avoid malfunctions. Ensure all connections are tightly secured and insulated to prevent short circuits. Regularly inspect the wiring for wear or damage to maintain optimal performance.

4.5. Final Assembly and Testing

After completing the installation, proceed to the final assembly and testing phase. Ensure all components are securely fastened and properly aligned. Reattach any decorative trim or covers. Test the exit device by activating the push bar to confirm smooth operation and proper latch bolt retraction. Check the electric strike’s functionality by opening and closing the door multiple times. Verify that the device meets all safety standards and operational requirements. Ensure the door closes securely and the latch engages correctly. Test any additional features, such as delayed egress or alarm systems, to ensure they function as intended. Make any necessary adjustments to the strike plate or latch bolt for optimal performance. Finally, inspect the entire assembly for any loose connections or wear and tear, ensuring long-term reliability and safety compliance.

Adjustments and Fine-Tuning

Adjustments and fine-tuning ensure optimal performance of the Von Duprin 99 Series exit device. Key areas include the latch bolt alignment and strike plate positioning for smooth operation and security.

5.1. Adjusting the Latch Bolt

Adjusting the latch bolt on the Von Duprin 99 Series exit device ensures proper door alignment and smooth operation. Begin by loosening the latch bolt screws using an Allen wrench. Carefully slide the bolt up or down to align it with the strike plate, ensuring it seats correctly. Once aligned, tighten the screws firmly to secure the bolt in place. Proper adjustment prevents excessive wear and ensures the door closes securely. Regular checks and adjustments maintain reliability and longevity of the exit device, aligning with Von Duprin’s commitment to durability and security in various commercial applications.

5.2. Setting the Proper Strike Alignment

Proper strike alignment is critical for the smooth operation of the Von Duprin 99 Series exit device. Start by ensuring the strike plate is securely fastened to the door frame. Next, check the alignment of the latch bolt with the strike plate by observing how the bolt engages when the door is closed. If misaligned, loosen the strike plate screws using an Allen wrench. Gently shift the strike plate up, down, or sideways to achieve proper alignment. Once aligned, tighten the screws firmly to hold the strike in place. Misalignment can cause uneven wear or failure to latch securely, so precise adjustment is essential. Regular checks and adjustments ensure optimal performance and maintain the device’s reliability and security features, key to Von Duprin’s reputation for durability and functionality in commercial settings.

Troubleshooting Common Issues

Identify and resolve common issues like device malfunction, strike misalignment, or wiring problems. Check for environmental factors affecting outdoor setups and ensure proper alignment and connections.

6.1. Device Not Functioning Properly

If the Von Duprin 99 Series exit device fails to function, first check for environmental factors like moisture or temperature variations, which can impact outdoor installations. Ensure the strike plate is properly aligned and securely fastened, as misalignment is a common issue. Verify that all electrical connections, including the wiring to the electric strike, are secure and undamaged. If the device is part of a remote monitoring system, ensure the remote undogging feature is not interfering. Additionally, inspect the latch bolt for obstructions or wear. If issues persist, consider using the Von Duprin RU retrofit kit for enhanced functionality. Always refer to the installation manual or contact technical support for further assistance.

6.2. Strike Plate Malalignment

Strike plate malalignment is a common issue that can prevent the Von Duprin 99 Series exit device from functioning correctly. If the strike plate is not properly aligned with the latch bolt, the door may not close securely or the exit device may not activate. To diagnose this, visually inspect the strike plate and latch bolt for proper alignment. If misaligned, loosen the screws on the strike plate and adjust it until it aligns correctly with the latch bolt. Ensure the strike plate is securely fastened after adjustment. Environmental factors like moisture or temperature variations, especially in outdoor installations, can exacerbate this issue. Consider using the Von Duprin Outdoor Defense option or RU retrofit kit for enhanced durability and alignment stability. Regular inspections and adjustments are crucial to maintain proper functionality and security.

Maintenance and Care

Regularly clean and lubricate Von Duprin 99 Series components to ensure smooth operation. Inspect for wear and tear, especially in outdoor environments, and replace damaged parts promptly.

7.1. Regular Cleaning and Lubrication

Regular cleaning and lubrication are essential to maintain the functionality of Von Duprin 99 Series exit devices. Use a soft cloth to wipe down the exterior, removing dirt and grime that may accumulate. Inspect and clean the latch bolt and strike plate regularly to ensure proper alignment and smooth operation. Apply a high-quality silicone-based lubricant to moving parts, such as hinges and springs, to reduce friction and wear. Avoid using harsh chemicals or abrasive materials that could damage the finish or internal components. For devices in outdoor environments, pay extra attention to areas exposed to moisture or extreme temperatures. Lubricate more frequently in harsh conditions to prevent corrosion and ensure reliable performance year-round. Regular maintenance will extend the lifespan of your Von Duprin exit device and guarantee optimal security and durability.

7.2. Inspecting for Wear and Tear

Regular inspections are crucial to identify wear and tear on Von Duprin 99 Series exit devices. Check the latch bolt, strike plate, and other moving parts for signs of excessive wear or damage. Look for rust, corrosion, or dents that could compromise functionality. Inspect the finish for scratches or fading, which may indicate exposure to harsh environmental conditions. Ensure all screws and fasteners are secure and tighten any loose components. Examine the exit bar and touch pad for proper alignment and smooth operation. If any damage or wear is detected, address it promptly to maintain the device’s performance and security. Use authorized Von Duprin replacement parts to ensure compatibility and reliability. Document your findings and schedule regular inspections to prevent minor issues from escalating into major problems. Proper maintenance ensures the device continues to meet safety and security standards effectively.

The Von Duprin 99 Series exit devices are engineered for exceptional security, durability, and reliability, making them a top choice for commercial applications. With innovative options like the Outdoor Defense feature and the cost-effective 70 Series, these devices provide robust solutions for various environments. Proper installation, regular maintenance, and timely inspections are essential to ensure optimal performance and longevity. By following the guidelines outlined in this guide, users can achieve a secure and functional installation that meets safety standards. Von Duprin’s commitment to quality and customer-centric innovation ensures their products remain a trusted choice for panic door hardware. Whether for new installations or upgrades, the Von Duprin 99 Series offers a reliable solution for enhancing door security and accessibility in high-traffic or critical environments.

lord of the rings the two towers pdf

The Two Towers, the second installment of J.R.R. Tolkien’s Lord of the Rings trilogy, continues the epic quest to destroy the One Ring. Published in 1954 in England and 1955 in the United States, it follows Frodo and Sam’s perilous journey to Mordor, while Aragorn, Legolas, and Gimli pursue Merry and Pippin. The book masterfully weaves together the fates of its characters, setting the stage for the climactic battle against Sauron’s darkness.

Background and Overview

The Two Towers, published in 1954 in England and 1955 in the United States, is the second part of J.R.R. Tolkien’s Lord of the Rings trilogy. It continues the story of Frodo and Sam’s perilous journey to destroy the One Ring, while Aragorn, Legolas, and Gimli search for Merry and Pippin. The book is divided into two main narratives, exploring themes of friendship, loyalty, and the struggle against darkness. Its epic scope and intricate world-building have made it a beloved classic, with PDF versions widely available for modern readers.

Significance in the Trilogy

The Two Towers serves as the pivotal middle chapter of The Lord of the Rings, bridging the fellowship’s breakup and the impending war. It deepens character arcs, introducing key figures like Gollum and Rohan, while escalating tensions. The book’s climax, the Battle of Helm’s Deep, showcases Tolkien’s mastery of epic storytelling. Its themes of perseverance and sacrifice highlight the trilogy’s central struggle between good and evil, making it indispensable to the narrative’s progression and emotional resonance. PDF versions capture this essence, preserving the story for new generations.

Plot Summary

Frodo and Sam journey toward Mordor, guided by Gollum, while Aragorn, Legolas, and Gimli search for Merry and Pippin, culminating in the epic Battle of Helm’s Deep.

Key Events and Turning Points

The Two Towers unfolds with Frodo and Sam journeying toward Mordor, guided by Gollum, while Aragorn, Legolas, and Gimli pursue Merry and Pippin. A pivotal moment occurs when Frodo and Sam face Gollum’s betrayal at the stairs of Cirith Ungol. Meanwhile, the Battle of Helm’s Deep ensues as Rohan defends against Saruman’s forces. Merry and Pippin’s encounter with Treebeard and their role in defeating Saruman mark another turning point. The book concludes with the destruction of Isengard, showcasing the growing threat of Sauron and the unyielding resolve of the Fellowship’s remnants.

Key Characters

Frodo Baggins, Samwise Gamgee, Aragorn, Legolas, and Gimli lead the quest, while Gandalf, Merry, and Pippin play pivotal roles in the unfolding drama. Gollum and Treebeard also shape the narrative.

Main Characters in The Two Towers

Frodo Baggins and Samwise Gamgee continue their perilous journey to destroy the One Ring, facing immense challenges. Aragorn, Legolas, and Gimli form an unlikely alliance to rescue Merry and Pippin. Gandalf returns, guiding the quest, while Gollum’s internal conflict deepens. Treebeard and the Rohirrim, led by Éomer and Éowyn, play pivotal roles in the unfolding narrative, shaping the fate of Middle-earth.

Character Development

Frodo faces increasing burden, showcasing resilience and selflessness. Sam evolves into a loyal protector, embodying unwavering friendship. Aragorn embraces his leadership role, revealing his noble lineage. Gollum’s internal struggle intensifies, highlighting his tragic duality. Merry and Pippin grow from innocence to valor, while Gandalf’s wisdom and power are reaffirmed. These developments deepen the emotional connection, enriching the narrative’s complexity and preparing characters for the ultimate showdown against darkness.

Major Themes

The struggle between good and evil, fellowship, sacrifice, and perseverance are central themes, emphasizing unity and resolve against overwhelming darkness and despair.

Central Themes Explored

The struggle between good and evil, sacrifice, loyalty, and perseverance are deeply explored. Frodo and Sam’s journey highlights the burden of responsibility and the power of friendship. Aragorn, Legolas, and Gimli’s pursuit of Merry and Pippin underscores the bonds of fellowship and the fight against overwhelming odds. The battle of Helm’s Deep symbolizes the resilience of free peoples against darkness, while internal conflicts, like the temptation of the Ring, reveal the complexity of characters and the moral dilemmas they face.

Symbolism and Motifs

The Two Towers symbolize Sauron’s strongholds, Minas Morgul and Orthanc, representing his oppressive power. The One Ring embodies ultimate power and corruption, central to the narrative.

The Two Towers Symbolism

The Two Towers themselves, Minas Morgul and Orthanc, symbolize Sauron’s oppressive power and control. The forest of Fangorn represents nature’s resilience, while the Ents embody slow, deliberate resistance. The Palantir reflects the duality of foresight and manipulation, highlighting the struggle between knowledge and corruption. These symbols weave together themes of power, resistance, and the eternal conflict between light and darkness in Middle-earth.

The Ring’s Significance

The One Ring, forged by Sauron, embodies his will to dominate Middle-earth. Its power to corrupt and enslave drives the trilogy’s narrative, making it the focal point of the quest. The Ring’s seductive influence tempts even noble characters, highlighting the fragility of resolve against overwhelming power. Its destruction in Mordor is the only hope for peace, underscoring the theme that true victory lies not in possession, but in sacrifice and the relinquishing of power.

Receptions and Reviews

The Two Towers received widespread critical acclaim for its rich storytelling, character depth, and thematic complexity. Fans praised its ability to expand the trilogy’s epic scope and emotional resonance.

Critical Reception

Critical reception for The Two Towers has been overwhelmingly positive, with many praising its masterful balance of action and emotional depth. Critics highlight its ability to expand the trilogy’s scope while delving deeper into the characters’ struggles. Published in 1954 in England and 1955 in the U.S., it solidified its place as a pivotal installment, with some considering it the trilogy’s best due to its thematic richness and narrative complexity.

Alright, so I need to generate a response for the subheading ‘

Fan Reviews and Impact

‘ under the topic ‘lord of the rings the two towers pdf’. The user has provided some specific instructions that I need to follow carefully. First, I must ensure that the response is exactly , no more, no less. That’s crucial because the user emphasized the word count.

The user has provided a lot of data from the internet, and I should use that to inform my response. From the data, I can gather that fans have praised ‘The Two Towers’ for its epic storytelling, character development, and emotional depth. It’s considered a prime example of how middle chapters in a trilogy can excel. The Peter Jackson film adaptation is also mentioned, which likely contributed to its popularity and impact on popular culture.

I should structure my response to highlight these points: fan appreciation for the story and characters, the effectiveness of the middle chapter in the trilogy, and the influence of the film adaptation. I need to make sure the language is clear and concise to fit within the 77-word limit.

Let me draft a possible response:

Fans of The Two Towers have long praised its epic storytelling and deep character development. Many consider it the best middle chapter in a trilogy, showcasing how such sections can thrive. The Peter Jackson film adaptation further amplified its popularity, making it a cultural phenomenon. Its themes of perseverance and fellowship resonate widely, solidifying its place in both literary and cinematic history.

Now, I’ll check the word count to ensure it’s exactly . Let me count them:

Fans
of
The
Two
Towers
have
long
praised
its
epic
storytelling
and
deep
character
development.
Many
consider
it
the
best
middle
chapter
in
a
trilogy,
showcasing
how
such
sections
can
thrive.
The
Peter
Jackson
film
adaptation
further
amplified
its
popularity,
making
it
a
cultural
phenomenon.
Its
themes
of
perseverance
and
fellowship
resonate
widely,
solidifying
its
place
in
both
literary
and
cinematic
history.

That’s . I need to add 15 more to reach 77; I’ll expand on the themes and impact a bit more.

Revised version:

Fans of The Two Towers have long praised its epic storytelling and deep character development. Many consider it the best middle chapter in a trilogy, showcasing how such sections can thrive. The Peter Jackson film adaptation further amplified its popularity, making it a cultural phenomenon; Its themes of perseverance and fellowship resonate widely, solidifying its place in both literary and cinematic history. The book’s ability to balance action with emotional depth has left a lasting impact on readers and viewers alike, ensuring its enduring appeal.

Now, let’s count:

Fans
of
The
Two
Towers
have
long
praised
its
epic
storytelling
and
deep
character
development.
Many
consider
it
the
best
middle
chapter
in
a
trilogy,
showcasing
how
such
sections
can
thrive.
The
Peter
Jackson
film
adaptation
further
amplified
its
popularity,
making
it
a
cultural
phenomenon.
Its
themes
of
perseverance
and
fellowship
resonate
widely,
solidifying
its
place
in
both

literary
and
cinematic
history.
The
book’s
ability
to
balance
action
with
emotional
depth
has
left
a
lasting
impact
on
readers
and
viewers
alike,
ensuring
its
enduring
appeal.

Oops, that’s . I need to trim it down. Let me remove some redundant phrases and tighten the language.

Final version:

Fans of The Two Towers have long praised its epic storytelling and deep character development; Many consider it the best middle chapter in a trilogy, showcasing how such sections can thrive. The Peter Jackson film adaptation amplified its popularity, making it a cultural phenomenon. Its themes of perseverance and fellowship resonate widely, solidifying its place in both literary and cinematic history. The book’s balance of action and emotional depth ensures its enduring appeal to readers and viewers alike.

Counting again:

Fans
of
The
Two
Towers
have
long
praised
its
epic
storytelling
and
deep
character
development.
Many
consider
it
the
best
middle
chapter
in
a
trilogy,
showcasing
how
such
sections
can
thrive.
The
Peter
Jackson
film
adaptation
amplified
its
popularity,
making
it
a
cultural
phenomenon.
Its
themes
of
perseverance
and
fellowship
resonate
widely,
solidifying
its
place
in
both
literary
and
cinematic
history.
The
book’s
balance
of
action
and
emotional
depth
ensures
its
enduring
appeal
to
readers
and
viewers
alike.

Now it’s , which is still one over. I’ll remove “viewers” to make it 77.

Final adjusted version:

Fans of The Two Towers have long praised its epic storytelling and deep character development. Many consider it the best middle chapter in a trilogy, showcasing how such sections can thrive. The Peter Jackson film adaptation amplified its popularity, making it a cultural phenomenon. Its themes of perseverance and fellowship resonate widely, solidifying its place in both literary and cinematic history. The book’s balance of action and emotional depth ensures its enduring appeal to readers alike.

Now, counting:

Fans
of
The
Two
Towers
have
long
praised
its
epic
storytelling
and
deep
character
development.
Many
consider
it
the
best
middle
chapter
in
a
trilogy,
showcasing
how
such
sections
can
thrive.
The
Peter
Jackson
film
adaptation
amplified
its
popularity,
making
it
a
cultural
phenomenon.
Its
themes
of
perseverance
and
fellowship
resonate
widely,
solidifying
its
place
in
both
literary
and
cinematic
history.
The
book’s
balance
of
66.

Okay, so I need to generate text for the ‘

Adaptations

‘ heading based on the topic ‘lord of the rings the two towers pdf’. The user has given specific instructions, so I need to follow them carefully. First, I have to make sure the response is exactly . Not less, not more. That’s crucial because the user emphasized the word count.

I also need to avoid including any information that will be covered in other subheadings. This means I should focus solely on adaptations without touching on things like critical reception or fan reviews, which I see were handled in previous responses. I should use the provided internet data to inform my response. From the data, I can see that there’s a mention of the Peter Jackson film and other adaptations like video games and radio plays.

I need to ensure the language is concise and fits within the 25-word limit. I’ll use bold tags for key terms like ‘The Two Towers’ and ‘Peter Jackson’ to emphasize them. Let me draft a possible response:

The Peter Jackson film adaptation of The Two Towers brought Middle-earth to life, while other adaptations include video games and radio plays, expanding its reach.

Now, I’ll count the words to make sure it’s exactly 25:

The
Peter
Jackson
film
adaptation
of
The
Two
Towers
brought
Middle-earth
to
life,
while
other
adaptations
include
video
games
and
radio
plays,
expanding
its
reach.

Perfect, that’s exactly . I think this response effectively covers the main adaptations without overlapping with other subheadings. It mentions the prominent film adaptation and touches on other media forms, giving a well-rounded view of how ‘The Two Towers’ has been adapted beyond the book.

The Peter Jackson Film

The Peter Jackson-directed film adaptation of The Two Towers was released in 2002 to critical acclaim; It vividly brought to life Middle-earth’s epic battles, such as Helm’s Deep, and the complex character dynamics, particularly the tragic figure of Gollum. The film’s visual effects and faithful storytelling enhanced the book’s narrative, contributing to the trilogy’s enduring popularity. Its success further cemented the book’s place in popular culture, attracting both fans of the novel and new audiences worldwide.

Other Notable Adaptations

Beyond Peter Jackson’s film, The Two Towers has been adapted into various forms, including radio plays and stage productions. A notable example is the 1981 animated film by Ralph Bakshi, which covers the first two books of the trilogy. Additionally, the book has been transformed into video games, further expanding its reach. The availability of PDF and eBook versions, such as the 2019 HarperCollins edition, ensures that fans can engage with the story in multiple formats, enhancing its accessibility and enduring appeal.

Availability and Downloads

The Two Towers is widely available as a PDF and eBook, with the HarperCollins 2010 edition being a popular choice. It can be downloaded from various online platforms, such as gosafir.com, ensuring easy access to this iconic fantasy novel.

PDF and eBook Options

The Two Towers is readily available in PDF and eBook formats, ensuring accessibility for modern readers. The HarperCollins 2010 edition PDF is a popular choice, offering the complete text in a single file. Various online platforms, such as Gosafir and Internet Archive, provide free downloads or reading options. Additionally, eBook formats like EPUB and MOBI are accessible, catering to readers who prefer digital formats. This versatility allows fans to immerse themselves in Middle-earth’s epic tale with ease and convenience.

Legal and Ethical Considerations

When accessing The Two Towers in PDF or eBook formats, it is crucial to ensure that the source is legal and ethical. Downloading copyrighted material from unauthorized websites violates copyright laws and undermines authors’ rights. Purchasing or downloading from reputable platforms like Amazon, HarperCollins, or authorized eBook stores supports the creators and adheres to legal standards. Always verify the legitimacy of the source to avoid piracy and promote ethical consumption of literary works.

Reading Formats

The Two Towers is available in various formats, including PDF and eBook, offering readers convenience and accessibility. Physical copies remain popular for their tactile experience, while digital versions allow easy portability and multi-device reading.

PDF vs. Physical Copies

When choosing between PDF and physical copies of The Two Towers, readers weigh convenience against tradition. PDFs offer portability, easy access, and space-saving benefits, making them ideal for modern readers. They can be downloaded from sources like Gosafir or Internet Archive, ensuring availability. On the other hand, physical copies provide a tactile experience, with the feel of paper and the artwork enhancing immersion. Both formats cater to different preferences, allowing fans to enjoy Tolkien’s masterpiece in their preferred way.

Study Resources and Guides

Study resources for The Two Towers include detailed summaries, character analyses, and thematic guides. PDF guides are widely available, offering insights into key events, characters, and themes, aiding both students and educators in exploring Tolkien’s work.

Resources for Further Study

For deeper exploration, PDF guides and ebooks provide comprehensive analyses of The Two Towers. These resources include detailed chapter summaries, character profiles, and thematic discussions. Additionally, online platforms offer downloadable study materials, such as PDF summaries and critical essays, which examine the novel’s structure, motifs, and cultural impact. These tools are invaluable for scholars and enthusiasts seeking to enrich their understanding of Tolkien’s work. They complement the novel by offering fresh perspectives and in-depth critiques.

Fan Engagement and Community

Fans of The Two Towers actively engage through online forums, fan art, and cosplay. Communities celebrate the novel’s themes and characters, fostering a vibrant cultural exchange and creativity.

Fandom Activities and Creations

Fans of The Two Towers express their passion through various creative outlets. Artwork depicting scenes from the book, such as the Battle of Helm’s Deep, is widely shared online. Cosplayers bring characters like Aragorn and Éowyn to life at conventions. Fan fiction explores alternate storylines, while communities create music and videos inspired by Middle-earth. These activities not only celebrate Tolkien’s work but also strengthen the bond among enthusiasts, fostering a thriving global fandom.

Cultural Impact

The Lord of the Rings: The Two Towers has become a cultural phenomenon, influencing literature, film, and art, while its themes of perseverance and fellowship continue to inspire audiences globally.

Influence on Popular Culture

The Two Towers has profoundly shaped modern fantasy, inspiring countless works of literature, film, and art. Its epic battles and richly detailed world-building set a new standard for the genre. The book’s themes of friendship and sacrifice resonate universally, making it a cultural touchstone. The success of Peter Jackson’s film adaptation further amplified its impact, influencing visual storytelling and cementing its place as a benchmark for fantasy narratives in popular culture worldwide.

Writing Style and Language

Tolkien’s prose in The Two Towers is rich and evocative, blending archaic and poetic language to create an immersive Middle-earth experience. His invented languages and dialects add depth and authenticity to the narrative, reflecting the cultural diversity of its characters and realms.

Tolkien’s Use of Language

Tolkien’s linguistic craftsmanship in The Two Towers enriches the narrative with invented languages like Elvish, Dwarvish, and the Black Speech, immersing readers in Middle-earth. His prose is both poetic and archaic, evoking a timeless quality. The detailed descriptions of landscapes and cultures enhance the story’s depth, while dialogue reflects the unique voices of each race, from the noble rhetoric of Rohan to the simple wisdom of Hobbits. This linguistic diversity underscores the trilogy’s thematic complexity and world-building brilliance;

Book Structure and Format

The Two Towers is divided into six chapters, beginning with “The Departure of Boromir” and ending with “The White Rider.” The PDF format maintains this structure, preserving Tolkien’s original narrative flow and chapter divisions, ensuring an immersive reading experience for fans of the trilogy.

Division into Chapters and Volumes

The Two Towers is structured into six chapters, each detailing pivotal events in Middle-earth. The PDF version mirrors this division, with chapters like “The Departure of Boromir” and “The White Rider.” Originally part of a trilogy, it follows The Fellowship of the Ring and precedes The Return of the King. This division allows readers to follow the fragmented Fellowship’s journeys, ensuring a cohesive narrative flow that builds anticipation for the trilogy’s conclusion.

The Two Towers masterfully bridges the first and final chapters of Tolkien’s trilogy, deepening character arcs and setting the stage for the epic climax. Its enduring themes of perseverance, friendship, and the struggle between good and evil leave a lasting impact on readers, solidifying its place as a literary masterpiece and a cornerstone of fantasy literature.

Final Thoughts on The Two Towers

The Two Towers is a masterful continuation of Tolkien’s trilogy, expertly weaving together the fates of its characters. Frodo and Sam’s unwavering resolve contrasts with the chaos surrounding them, while Aragorn’s leadership and Merry and Pippin’s unexpected bravery highlight the power of unity. Themes of sacrifice, friendship, and resilience shine through, making this novel a compelling and emotionally resonant read. Its intricate world-building and rich storytelling ensure its timeless appeal, leaving readers eager for the final chapter of the quest to destroy the One Ring.

the purloined letter pdf

Edgar Allan Poe’s “The Purloined Letter” is a masterful tale of mystery and intellect, exploring themes of deception and psychological intrigue through a stolen royal document․

1․1 Overview of the Story

“The Purloined Letter” by Edgar Allan Poe revolves around a stolen royal document and the intellectual battle to retrieve it․ Set in Paris, the story follows C․ Auguste Dupin, a brilliant detective, as he outwits the police and the thief․ The tale explores themes of deception, psychological manipulation, and the power of reason․ The PDF version of this story is widely available for download, offering readers a gripping narrative that showcases Poe’s mastery of mystery and suspense, making it a timeless classic in detective fiction․

1․2 Historical Context

Edgar Allan Poe’s “The Purloined Letter,” published in 1844, is set in Paris during the autumn of 18–, reflecting the cultural and literary trends of the mid-19th century․ The story, part of Poe’s groundbreaking C․ Auguste Dupin series, introduced the concept of the analytical detective, influencing the detective fiction genre․ Its historical significance lies in its exploration of psychological and intellectual themes, marking a shift in literary focus from romanticism to realism․ The PDF version of the story remains popular, offering readers insight into Poe’s pioneering work in mystery and suspense literature․

1․3 Importance of the Letter

The purloined letter in Poe’s tale symbolizes power and leverage, as its contents could compromise the reputation of the royal family․ The letter’s significance extends beyond its physical form, representing themes of possession, secrecy, and the psychological impact of knowledge․ Its theft drives the plot, showcasing the intellect of C․ Auguste Dupin as he unravels the mystery․ The letter’s importance is underscored by its ability to influence political and personal dynamics, making it a central element in the story’s exploration of deception and reason․ Its absence fuels the narrative’s tension and resolution․

Plot Summary

In 18th-century Paris, a stolen royal letter sparks a thrilling mystery․ Detective C․ Auguste Dupin ingeniously uncovers the letter’s hiding place, showcasing his extraordinary analytical skills․

2․1 Setting and Atmosphere

The story is set in 18th-century Paris, during a gusty autumn evening․ The dark, windy atmosphere creates a sense of mystery and tension․ The setting primarily occurs in the library of C․ Auguste Dupin’s Parisian apartment, where the intellectual detective ponders the case․ The dimly lit, cozy room, filled with books, contrasts with the stormy night outside, emphasizing the psychological depth of the narrative․ The stolen letter’s presence looms over the city, heightening the suspense and intrigue․

2․2 Main Characters

The protagonist, C․ Auguste Dupin, is a brilliant detective known for his analytical mind․ The narrator, Dupin’s friend, often assists and narrates the story․ The Queen is the victim whose letter is stolen, while the cunning Minister D– masterminds the theft․ Each character plays a crucial role in unraveling the mystery, showcasing their intellect, deceit, or desperation․ Their interactions drive the plot, highlighting the battle of wits and psychological depth central to the story․

2․3 The Mystery Unfolds

The story centers on a stolen letter of immense political significance, hidden by the cunning Minister D–․ Dupin, using his extraordinary analytical skills, deduces the letter’s location by understanding the thief’s mindset․ The letter is found in plain sight, concealed in a card rack, revealing Dupin’s mastery of psychological insight․ The tension builds as the narrator and Dupin retrieve the letter, culminating in a dramatic climax․ This section showcases the intellectual battle between Dupin and the Minister, highlighting the power of reason and clever deception․

2․4 The Resolution

The resolution unfolds as Dupin cleverly retrieves the stolen letter, outwitting the Minister D–․ By understanding the Minister’s cleverness, Dupin anticipates his actions and devises a plan․ The letter is found in a card rack in the Minister’s office, hidden in plain sight․ Dupin’s success is a testament to his intellectual prowess, as he returns the letter to its rightful owner, resolving the mystery with precision and brilliance․ The story concludes with a sense of triumph, emphasizing the power of reason over cunning deception․

Themes and Motifs

Central themes include the power of reason, deception, and the unreliability of appearances, highlighting the psychological and intellectual battles between characters․

3․1 The Power of Reason and Intellect

In “The Purloined Letter,” Poe emphasizes the triumph of analytical thinking through C․ Auguste Dupin, who solves the mystery using logical reasoning․ His intellect surpasses ordinary detective methods, showcasing how a disciplined mind can unravel complex puzzles․ The story highlights the power of reason over chance, as Dupin’s deductions outwit both the thief and the police․ This theme underscores Poe’s fascination with the human psyche and the potential of intellect to uncover hidden truths, making it a cornerstone of the tale’s suspense and intrigue․

3․2 Deception and Concealment

Deception and concealment are central to “The Purloined Letter,” as the story revolves around a stolen document hidden in plain sight․ Minister D– employs cunning to mislead investigators, relying on psychological manipulation rather than physical secrecy․ The police fail to retrieve the letter because they overlook its obvious location, highlighting the theme of deception through simplicity․ Meanwhile, C․ Auguste Dupin’s analytical mind uncovers the truth, demonstrating how intellect can penetrate layers of concealment․ This interplay of deception and revelation drives the story’s tension and underscores Poe’s exploration of human psychology․

3․3 The Unreliability of Appearances

The story highlights the unreliability of appearances through the letter’s hiding in plain sight․ The police, focusing on complex hiding spots, overlook the letter’s obvious location, underscoring how deception often lies in simplicity․ Minister D–‘s clever concealment tricks the police, while Dupin’s insight reveals the truth beneath the surface․ This theme illustrates how appearances can mislead, emphasizing the importance of looking beyond the obvious․ Poe masterfully uses this motif to explore the tension between perception and reality․

Literary Analysis

Poe’s “The Purloined Letter” masterfully explores psychological depth, showcasing the power of reason over intuition through Dupin’s analytical methods, a cornerstone of detective fiction’s intellectual appeal․

4․1 Symbolism in the Story

The stolen letter in Poe’s tale serves as a potent symbol of power, secrecy, and the consequences of possession․ Its absence represents vulnerability, while its presence signifies control․ The ministers’ actions symbolize the lengths individuals will go to protect secrets․ The letter’s hiding place, in plain sight, underscores the theme of appearances being deceptive․ These elements collectively illustrate the psychological and moral complexities of human behavior, making the letter a multifaceted symbol central to the story’s narrative and philosophical depth․

4․2 The Role of the Detective

C․ Auguste Dupin, the detective in “The Purloined Letter,” embodies the archetype of the analytical mind․ His extraordinary abilities of observation and deduction set him apart from conventional detectives․ Dupin’s approach is both intellectual and intuitive, as he unravels the mystery through psychological insight rather than physical evidence․ His character symbolizes the triumph of reason over chaos, showcasing Poe’s emphasis on the power of the human intellect․ Dupin’s role not only solves the crime but also highlights the complexity of human behavior and the art of deception, making him a pivotal figure in the narrative․

4․3 Exploration of the Human Psyche

Edgar Allan Poe’s “The Purloined Letter” delves into the complexities of the human mind, showcasing a battle of wits between C․ Auguste Dupin and the cunning thief․ The story explores themes of pride, ambition, and the psychological strategies employed by both characters․ Dupin’s ability to think like the criminal underscores the power of empathy and understanding in solving mysteries․ The narrative also highlights the psychological tension created by the thief’s bold yet clever misdirection, revealing how human behavior often hides behind layers of deception and intellect․

Availability as a PDF

Edgar Allan Poe’s “The Purloined Letter” is accessible as a free PDF download from multiple platforms, including Lit2Go, offering various formats like ePUB and Mobi for easy reading․

5․1 Sources for Download

Literature enthusiasts can access “The Purloined Letter” as a PDF through platforms like Lit2Go, FreeBooks, and various e-book repositories․ These sources offer free downloads, ensuring easy access to Poe’s classic tale․ Additionally, Google Chrome users can utilize the browser’s download capabilities to obtain the PDF seamlessly․ Many websites provide direct links, making it convenient for readers to acquire the story in formats compatible with their devices․ Ensuring accessibility, these sources cater to a wide audience, fostering the timeless appeal of Poe’s work․

5․2 Formats and Compatibility

“The Purloined Letter” is available in various formats, including PDF, ePub, Mobi, and Fb2, ensuring compatibility across different devices and reading platforms․ The PDF version is particularly popular due to its universal accessibility and retention of formatting․ Readers can easily download and view the story on smartphones, tablets, or computers․ Additionally, using browsers like Google Chrome simplifies the download process, making it convenient for users to enjoy Poe’s work on their preferred devices without compatibility issues․

5․3 Legal Considerations

“The Purloined Letter” by Edgar Allan Poe is in the public domain, making it legally accessible for free download in PDF and other formats․ Users can obtain the story from reputable sources like Lit2Go and other public domain repositories without infringing on copyright laws․ However, it’s important to ensure that downloads are made from legitimate websites to avoid potential legal issues and to support the ethical distribution of literary works․

The Author: Edgar Allan Poe

Edgar Allan Poe, a literary icon, crafted “The Purloined Letter” as a seminal work in detective fiction, showcasing his mastery of psychological storytelling and intellectual depth․

6․1 Biography and Influence

Edgar Allan Poe (1809–1849) was a visionary American writer, poet, and critic, renowned for his pioneering work in detective fiction․ His innovative storytelling in “The Purloined Letter” showcased his mastery of psychological depth and logical reasoning, influencing generations of writers․ As the creator of C․ Auguste Dupin, Poe laid the groundwork for modern detective characters like Sherlock Holmes․ His works continue to captivate readers, solidifying his legacy as a literary icon and a trailblazer in the mystery genre․

6․2 Writing Style and Legacy

Edgar Allan Poe’s writing style is renowned for its atmospheric richness, emotional depth, and masterful use of suspense․ In “The Purloined Letter,” his meticulous plotting and psychological insight set a new standard for detective fiction․ Poe’s legacy endures through his exploration of the human psyche and his innovative use of rational thinking to solve complex mysteries․ His works continue to inspire writers and adaptors, cementing his status as a foundational figure in both American literature and the detective genre, influencing countless stories and films to this day․

6․3 Other Notable Works

Edgar Allan Poe’s literary prowess extends beyond “The Purloined Letter” to include iconic works like “The Murders in the Rue Morgue,” “The Mystery of Marie Rogêt,” and “The Raven․” These tales showcase his mastery of mystery, horror, and psychological depth․ His innovative storytelling and atmospheric style have left an indelible mark on literature, influencing generations of writers and solidifying his place as a pioneer of detective fiction and Gothic literature․

Cultural Impact

“The Purloined Letter” has profoundly influenced detective fiction, shaping the genre and inspiring countless adaptations․ Its psychological depth and intricate plotting continue to captivate modern audiences globally․

7․1 Adaptations and Interpretations

Edgar Allan Poe’s “The Purloined Letter” has been adapted into various formats, including films, stage plays, and audio dramas, each offering unique interpretations of the story․ Its psychological depth and intricate plot have inspired creative reimaginations, while its themes of deception and intellect remain central․ The story’s availability in PDF and other digital formats has further expanded its reach, allowing modern audiences to engage with Poe’s classic tale in new and innovative ways, ensuring its enduring cultural relevance and appeal․

7․2 Influence on Detective Fiction

Edgar Allan Poe’s “The Purloined Letter” significantly influenced the detective fiction genre, establishing key elements like analytical reasoning and psychological insight․ Its protagonist, C․ Auguste Dupin, became a prototype for future detectives, such as Sherlock Holmes․ The story’s focus on intellectual puzzle-solving and criminal psychology set a benchmark for modern detective narratives․ Its availability in PDF and digital formats has ensured its continued influence, inspiring writers and shaping the evolution of the genre with its innovative storytelling and enduring themes of intellect and deception․

7․3 Popularity in Modern Times

Despite its 19th-century origins, “The Purloined Letter” remains popular today due to its timeless themes of intellect, deception, and psychological intrigue․ Its availability as a free PDF has made it easily accessible to modern readers, ensuring its enduring appeal․ The story’s focus on analytical reasoning and criminal psychology continues to captivate audiences, making it a staple in literature studies and a favorite among fans of detective fiction․ Its influence on modern media and its ability to spark intellectual curiosity keep it relevant in contemporary culture․

Reading the PDF

Reading “The Purloined Letter” as a PDF offers an accessible way to engage with Poe’s intellectual depth and intricate narrative, ensuring a timeless literary experience․

8․1 Tips for Digital Reading

Enhance your experience of “The Purloined Letter” PDF by adjusting font size and brightness for readability․ Download from trusted sources like Lit2Go or official repositories for quality assurance․ Use browsers like Chrome for seamless navigation, and consider bookmarking key passages for easy reference․ Enable search functions to locate specific quotes or themes quickly․ For optimal viewing, switch to full-screen mode and utilize zoom features․ Ensure your device is updated for compatibility with PDF formats, and explore annotation tools to deepen your analysis of Poe’s masterpiece․

8․2 Enhancing the Reading Experience

To fully immerse yourself in “The Purloined Letter” PDF, consider using night mode for evening reads and adjusting font size for comfort․ Enable bookmarks and annotations to highlight key passages and analyze themes deeply․ Use built-in search tools to quickly locate specific quotes or plot points․ Customize your reading environment by minimizing distractions and ensuring proper lighting․ Explore zoom features for detailed text examination․ These enhancements allow you to engage more deeply with Poe’s intricate narrative and intellectual puzzles, ensuring a richer understanding of the story’s layers and complexity․

8․3 Navigation and Accessibility

The PDF version of “The Purloined Letter” offers seamless navigation, with bookmarks and a table of contents for easy access to different sections․ Readers can zoom in or out for optimal text size, while text-to-speech tools enhance accessibility․ The document is compatible with screen readers, making it accessible to visually impaired readers․ Additionally, the portable format allows reading on various devices, ensuring convenience and flexibility․ These features ensure that the story remains accessible and engaging for a wide audience, regardless of their reading preferences or abilities․

“The Purloined Letter” remains a timeless tale of intellect and deception, offering insights into human psychology and the power of reason․ Its enduring popularity ensures continued exploration and appreciation․

9․1 Summary of Key Points

Edgar Allan Poe’s “The Purloined Letter” is a seminal work in detective fiction, showcasing the analytical mind of C․ Auguste Dupin․ The story revolves around a stolen letter of immense political significance, highlighting themes of reason, deception, and psychological depth․ Its exploration of intellectual prowess and human psychology solidifies its place as a cornerstone of literary mystery․ The tale’s enduring popularity underscores Poe’s lasting influence on the genre, making it a must-read for enthusiasts of detective narratives and classic literature․

9․2 Final Thoughts and Reflections

“The Purloined Letter” remains a literary treasure, showcasing Edgar Allan Poe’s mastery of psychological depth and intellectual intrigue․ Its exploration of human intellect and deception continues to captivate readers, solidifying its legacy in detective fiction․ The story’s themes of reason and concealment highlight Poe’s innovative storytelling, while its availability in PDF formats ensures accessibility for modern audiences․ This timeless tale not only entertains but also invites reflection on the power of the human mind, making it a enduring classic in world literature․

9․3 Encouragement for Further Exploration

Exploring “The Purloined Letter” in PDF format offers readers a convenient way to delve into Poe’s ingenious storytelling․ With free downloads available in multiple formats, including PDF, ePUB, and MOBI, fans of detective fiction can easily access this classic tale․ The story’s enduring appeal lies in its psychological depth and pioneering influence on the genre․ Readers are encouraged to explore the PDF version to uncover the intricate plot and Themes, gaining a deeper appreciation for Poe’s literary genius and its lasting impact on modern literature․

kindergarten screening test pdf

Kindergarten screening tests are tools used to assess a child’s readiness for formal education. These tests evaluate various skills, including academic, social-emotional, and physical development. They help identify strengths and areas needing support. Screening tests like the BRIGANCE Early Childhood Kindergarten Screen III and the Get Ready to Read! Screening Tool are widely used. These assessments provide insights into a child’s readiness, ensuring a smooth transition to kindergarten. They are essential for early intervention and personalized learning plans.

1.1 Overview of Screening Tests

Kindergarten screening tests are comprehensive tools designed to evaluate a child’s readiness for formal education. These assessments typically cover various domains, including academic skills, social-emotional development, and physical abilities. They are often administered at the beginning of the kindergarten year or during pre-kindergarten to identify areas where children may need additional support. Screening tests are not exams in the traditional sense but rather observational and interactive tools that help educators understand each child’s strengths and challenges.

One widely used screening tool is the Get Ready to Read! Screening Tool, a 20-item early literacy assessment for children entering kindergarten. It evaluates skills such as phonological awareness, rhyming, and high-frequency word recognition. Another example is Kentucky’s Common Kindergarten Entry Screener, which assesses five key areas: Academic/Cognitive, Language, Physical Development, Self-Help, and Social-Emotional Development. These tests are often administered one-on-one by teachers, speech pathologists, or school nurses, ensuring a personalized approach to evaluation.
Many screening tests are available as free printable PDFs, making them accessible to educators and parents. For instance, the BRIGANCE Early Childhood Kindergarten Screen III provides a quick and accurate assessment of a child’s development in multiple domains. These tools often include checklists, observation guides, and hands-on activities to gauge readiness. For example, some assessments evaluate a child’s ability to recognize numerals, count, and demonstrate basic geometric awareness.

In addition to academic skills, screening tests often assess social-emotional development, such as self-awareness, interpersonal skills, and self-regulation. Parents are sometimes involved in these evaluations, providing insights into their child’s abilities and behaviors at home. The data collected from these screenings is used to create personalized learning plans, ensuring that each child receives tailored support.

Overall, kindergarten screening tests are essential for identifying a child’s readiness for school and providing a foundation for successful early education. They are flexible, comprehensive, and designed to support both teachers and students in the transition to formal learning.

1.2 Importance in Early Education

Kindergarten screening tests play a crucial role in early education by providing educators and parents with valuable insights into a child’s developmental readiness. These assessments help identify areas of strength and weakness, enabling early intervention and personalized support. By evaluating skills such as literacy, numeracy, social-emotional development, and physical abilities, screening tests ensure that children receive tailored guidance from the start of their educational journey.

One of the key benefits of kindergarten screening is its ability to foster early intervention. For example, if a child shows delays in phonological awareness or social skills, educators can implement targeted strategies to address these areas. This proactive approach helps prevent long-term learning gaps and promotes academic success. Additionally, screening tests allow teachers to create differentiated instruction plans, catering to the diverse needs of their students.

Another important aspect of kindergarten screening is its role in building a strong foundation for future learning; By assessing skills such as letter recognition, counting, and problem-solving, educators can determine a child’s readiness for formal instruction. This information is critical for designing curriculum that aligns with the needs of the class while also supporting individual growth. Screening tests also help identify gifted students who may require advanced challenges.

Moreover, kindergarten screening tests provide a framework for communication between teachers and parents. Many assessments include parent-completed sections, allowing educators to gain insights into a child’s behaviors and abilities outside the classroom. This collaboration ensures a cohesive approach to a child’s education and development.

1.3 Brief History and Evolution

The concept of kindergarten screening tests has evolved significantly over the years, reflecting changes in educational philosophy and our understanding of child development. The origins of these assessments can be traced back to the mid-20th century, when educators began recognizing the importance of early childhood education and the need to prepare children for formal schooling.

In the early years, screening tests were often informal and focused primarily on basic skills such as letter and number recognition. These early assessments were typically administered by teachers and served as a way to gauge a child’s readiness for the classroom environment. Over time, however, the scope of these tests expanded to include a broader range of skills, such as social-emotional development and fine motor abilities.

One of the key milestones in the evolution of kindergarten screening tests was the development of standardized tools like the BRIGANCE Early Childhood Kindergarten Screen III. This comprehensive assessment evaluates children in five developmental domains: academic/cognitive, language, physical, self-help, and social-emotional. Such tools marked a shift towards more structured and objective evaluations, enabling educators to identify areas where children might need additional support.

In recent years, there has been a growing emphasis on early literacy and numeracy skills. Tools like the Get Ready to Read! Screening Tool, developed by the National Center for Learning Disabilities and Pearson Education, focus on assessing a child’s readiness for reading and other academic tasks. These modern assessments often incorporate both traditional and digital formats, making them more accessible and efficient.

The evolution of kindergarten screening tests also reflects a greater understanding of the importance of early intervention. By identifying potential challenges early, educators and parents can work together to provide targeted support, ensuring that children enter kindergarten with a strong foundation for success. This ongoing development highlights the critical role these assessments play in shaping early education and fostering lifelong learning.

Purpose and Importance of Screening

Kindergarten screening tests serve as essential tools for evaluating children’s readiness for formal education. These assessments identify strengths, areas for growth, and potential learning challenges. By measuring skills like literacy, numeracy, and social-emotional development, screenings help educators tailor instruction to individual needs. Early identification of delays or disabilities enables timely interventions, promoting academic success and emotional well-being. Screening also fosters collaboration between teachers and parents, ensuring a supportive transition to kindergarten and laying the foundation for lifelong learning.

2.1 Evaluating Readiness for Kindergarten

Evaluating a child’s readiness for kindergarten is a critical step in ensuring their smooth transition into formal education. Kindergarten screening tests are designed to assess various developmental domains, including academic, social-emotional, and physical skills. These assessments help determine whether a child is prepared to meet the expectations of a kindergarten classroom.

One key aspect of readiness is academic preparedness, which includes basic literacy and numeracy skills. Tests such as the BRIGANCE Early Childhood Kindergarten Screen III evaluate a child’s ability to recognize numerals, count, and understand basic geometric shapes; Additionally, language and listening skills are assessed to gauge a child’s ability to follow instructions and communicate effectively.

Social-emotional readiness is another critical factor. Screening tools often include questions about a child’s ability to interact with peers, demonstrate self-awareness, and regulate their emotions. For example, the Get Ready to Read! Screening Tool includes items that assess interpersonal awareness and self-regulation skills, which are essential for classroom success.

Physical development is also evaluated, as fine motor skills, such as writing their name or using utensils, are important for academic tasks. Self-help skills, like dressing and using the bathroom independently, are also considered indicators of readiness.

By identifying areas of strength and weakness, these assessments enable educators to tailor instruction and provide targeted support. Parents also benefit from understanding their child’s readiness, allowing them to address any gaps before the start of kindergarten. Ultimately, evaluating readiness ensures that children enter kindergarten with the skills and confidence needed to thrive in a structured learning environment.

2.2 Identifying Strengths and Weaknesses

Kindergarten screening tests play a vital role in identifying a child’s strengths and weaknesses, providing educators and parents with valuable insights into their developmental progress. These assessments evaluate various domains, including academic, social-emotional, and physical skills, to determine areas where a child excels and areas that may require additional support.

Academically, screening tools such as the BRIGANCE Early Childhood Kindergarten Screen III assess skills like recognizing numerals, counting, and understanding basic shapes. Language and listening abilities are also evaluated, helping to identify children who may need extra help with communication or following instructions. For instance, the Get Ready to Read! Screening Tool includes items that measure phonological awareness, rhyming, and oral blending skills, which are foundational for reading.

In the social-emotional domain, tests often include questions about a child’s ability to interact with peers, demonstrate self-awareness, and regulate emotions. For example, the Kentucky Kindergarten Entry Screener evaluates interpersonal awareness and self-regulation skills, which are critical for classroom success. Identifying strengths in these areas can help teachers build on positive behaviors, while weaknesses may indicate the need for early intervention.

Physically, screening tests assess fine motor skills, such as writing their name or using utensils, and gross motor skills, like running or jumping. These evaluations help determine a child’s readiness for tasks requiring hand-eye coordination and dexterity. Additionally, self-help skills, such as dressing and using the bathroom independently, are often reviewed to ensure a child is prepared for the practical demands of kindergarten.

By pinpointing specific strengths and weaknesses, kindergarten screening tests enable educators to tailor instruction and provide targeted support. Parents also benefit from these insights, as they can work with teachers to address areas of concern before the school year begins. This collaborative approach ensures that every child enters kindergarten with the tools they need to succeed.

2.3 Role in Early Intervention

Kindergarten screening tests play a pivotal role in early intervention by identifying children who may need additional support before or during their transition to formal education. These assessments provide educators and parents with critical insights into a child’s developmental status, enabling timely and targeted interventions. Early intervention is essential for addressing delays or challenges in academic, social-emotional, or physical development, ensuring that children are well-prepared for the demands of kindergarten and beyond.

One of the primary purposes of kindergarten screening is to detect potential learning difficulties or developmental delays. For example, tools like the BRIGANCE Early Childhood Kindergarten Screen III evaluate skills across multiple domains, including academic/cognitive, language, physical, and social-emotional development. By identifying gaps early, educators can implement tailored strategies to address these areas before they become significant barriers. This proactive approach not only supports individual learning needs but also fosters a more inclusive and effective classroom environment.

Moreover, screening tests like the Get Ready to Read! Screening Tool focus on early literacy skills, such as phonological awareness and oral blending, which are critical for reading success. Early identification of children at risk of reading difficulties allows for targeted interventions, such as small-group instruction or phonics-based activities, to help them catch up with their peers. Similarly, social-emotional assessments can highlight children who may need support with self-regulation or interpersonal skills, enabling teachers to incorporate activities that promote emotional intelligence and collaboration.

The data collected from kindergarten screening tests also inform the creation of personalized learning plans. By understanding a child’s strengths and weaknesses, educators can adapt their teaching methods to meet individual needs. For instance, a child struggling with fine motor skills may benefit from additional practice with writing or using manipulatives, while a child with advanced math skills might engage in enrichment activities.

Types of Kindergarten Screening Tests

Kindergarten screening tests are designed to evaluate various aspects of a child’s development. Common types include readiness assessments, academic skills tests, and social-emotional evaluations. Readiness assessments measure basic skills like alphabet recognition and number sense. Academic tests focus on early literacy and math abilities. Social-emotional assessments evaluate self-regulation and interpersonal skills. These tests help identify strengths and areas needing support, ensuring a smooth transition to kindergarten. They are essential for tailored instruction and early intervention.

3.1 Readiness Assessments

Readiness assessments are a fundamental component of kindergarten screening tests, designed to evaluate a child’s foundational skills and preparedness for formal education. These assessments typically focus on key areas such as alphabet recognition, number sense, basic shape identification, and fine motor skills. They also gauge a child’s ability to follow instructions, demonstrate problem-solving abilities, and engage in group activities.

One widely used tool for readiness assessments is the BRIGANCE Early Childhood Kindergarten Screen III, which evaluates academic, language, physical, and social-emotional development. Similarly, the Get Ready to Read! Screening Tool is a 20-item early literacy assessment that identifies skills like letter naming, rhyming, and phonemic awareness. These tools provide educators with a comprehensive understanding of a child’s baseline abilities.

Readiness assessments are often administered at the start of the kindergarten year or during pre-kindergarten screenings. They are typically conducted in a one-on-one setting, allowing teachers to observe and document individual strengths and areas needing support. These assessments also serve as a guide for parents, helping them understand their child’s developmental milestones and how to foster continued growth.

In addition to academic skills, readiness assessments may include social-emotional components, such as self-awareness and interpersonal skills. For example, the Kentucky Kindergarten Entry Screener evaluates a child’s ability to interact with peers, regulate emotions, and demonstrate independence. By identifying areas of need early, educators can implement targeted interventions to ensure a smooth transition into kindergarten.

Overall, readiness assessments play a critical role in laying the foundation for a child’s educational journey. They provide valuable insights into a child’s current abilities and help shape instruction to meet individual needs.

3.2 Academic Skills Tests

Academic skills tests are a crucial part of kindergarten screening processes, designed to evaluate a child’s foundational knowledge in core subjects such as reading and mathematics. These assessments are tailored to identify a child’s proficiency in areas like alphabet recognition, basic numeracy, and early literacy skills. Tools such as the Starfall Kindergarten Math Assessment and the Get Ready to Read! Screening Tool are commonly used to gauge a child’s academic readiness.
The Starfall Kindergarten Math Assessment focuses on skills such as recognizing numerals (0-10), counting from one to a given number, and identifying basic geometric shapes. This tool helps educators understand a child’s grasp of fundamental math concepts before they enter formal schooling. Similarly, the Get Ready to Read! Screening Tool evaluates early literacy skills, including letter naming, rhyming, and phonemic awareness. These assessments are designed to provide a clear picture of a child’s academic strengths and areas where additional support may be needed.

Academic skills tests often include both written and verbal components. For instance, children may be asked to identify letters, count objects, or complete simple puzzles. These activities not only assess their knowledge but also their ability to follow instructions and think critically. In some cases, these tests are administered in a one-on-one setting to ensure accuracy and to allow for personalized feedback.

The results of academic skills tests are invaluable for educators and parents alike. They provide insights into a child’s readiness for kindergarten and help identify any gaps in their knowledge. For example, if a child struggles with letter recognition, educators can tailor their instruction to address this specific need. Conversely, if a child demonstrates advanced skills, teachers can plan enrichment activities to challenge them further.

3.3 Social-Emotional Assessments

Social-emotional assessments are a vital component of kindergarten screening tests, focusing on evaluating a child’s ability to interact with others, manage emotions, and develop self-awareness. These assessments help identify a child’s social and emotional readiness for the classroom environment, ensuring they can thrive both academically and personally.

One widely used tool for social-emotional assessment is the Kentucky’s Common Kindergarten Entry Screener, which evaluates areas such as self-help and social-emotional development. This tool provides educators with insights into a child’s ability to cooperate with peers, demonstrate empathy, and regulate their emotions. Similarly, the BRIGANCE Early Childhood Kindergarten Screen III includes sections on social-emotional development, assessing skills like sharing, taking turns, and expressing feelings appropriately.

These assessments often involve observation and parent-teacher collaboration. For instance, teachers may observe how a child interacts during group activities, while parents provide feedback on their child’s behavior at home. This dual perspective offers a comprehensive understanding of a child’s social-emotional strengths and challenges.
Key areas evaluated in social-emotional assessments include self-awareness, interpersonal skills, and self-regulation. Self-awareness involves a child’s understanding of their own identity and emotions, while interpersonal skills assess their ability to form positive relationships with others. Self-regulation focuses on a child’s capacity to control their emotions and behaviors, especially in challenging situations.

The results of these assessments are used to create supportive learning environments. For example, if a child struggles with sharing or expressing emotions, teachers can incorporate activities that promote teamwork and emotional awareness. Conversely, a child who demonstrates strong social-emotional skills can serve as a role model for peers.